Chapter 3: Education And Workshop Preparations
This area is where you get yourself and your shop ready for the build. Some of the things I held off on just so I could get building (like shop prep for cold weather). Getting familiar with the education on how to do composite work will do a lot for you as a builder, so do take some time to go over these aspects.

Shop Prep
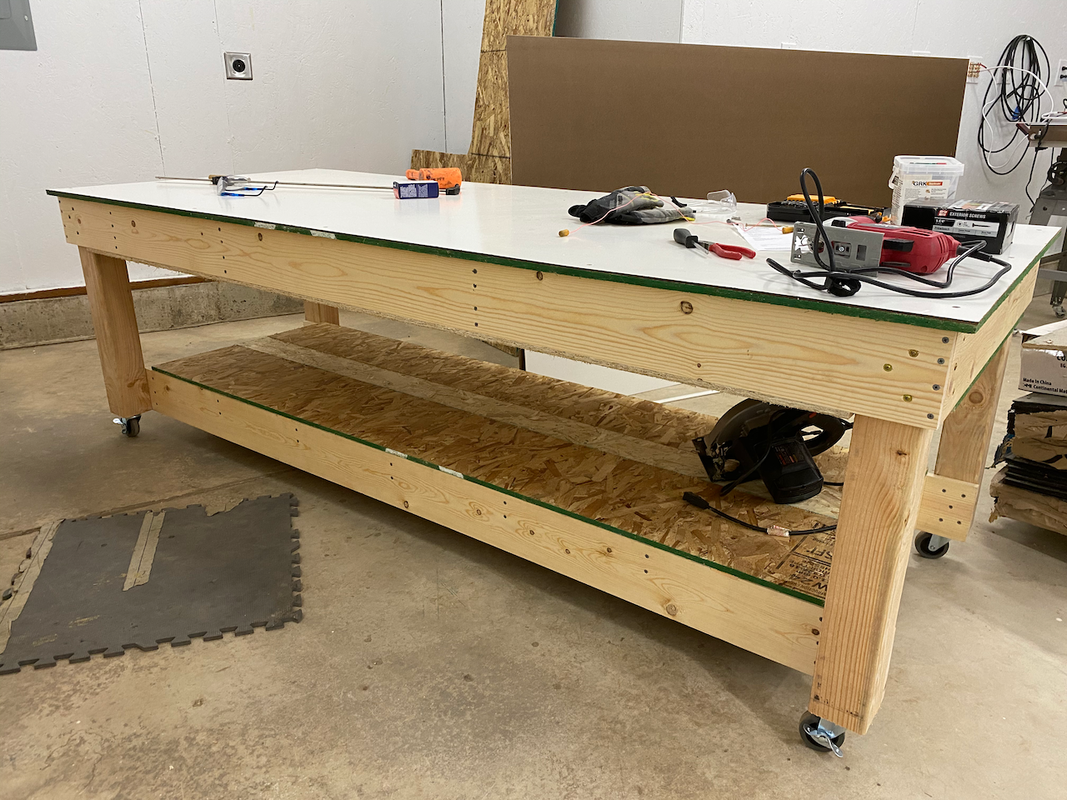
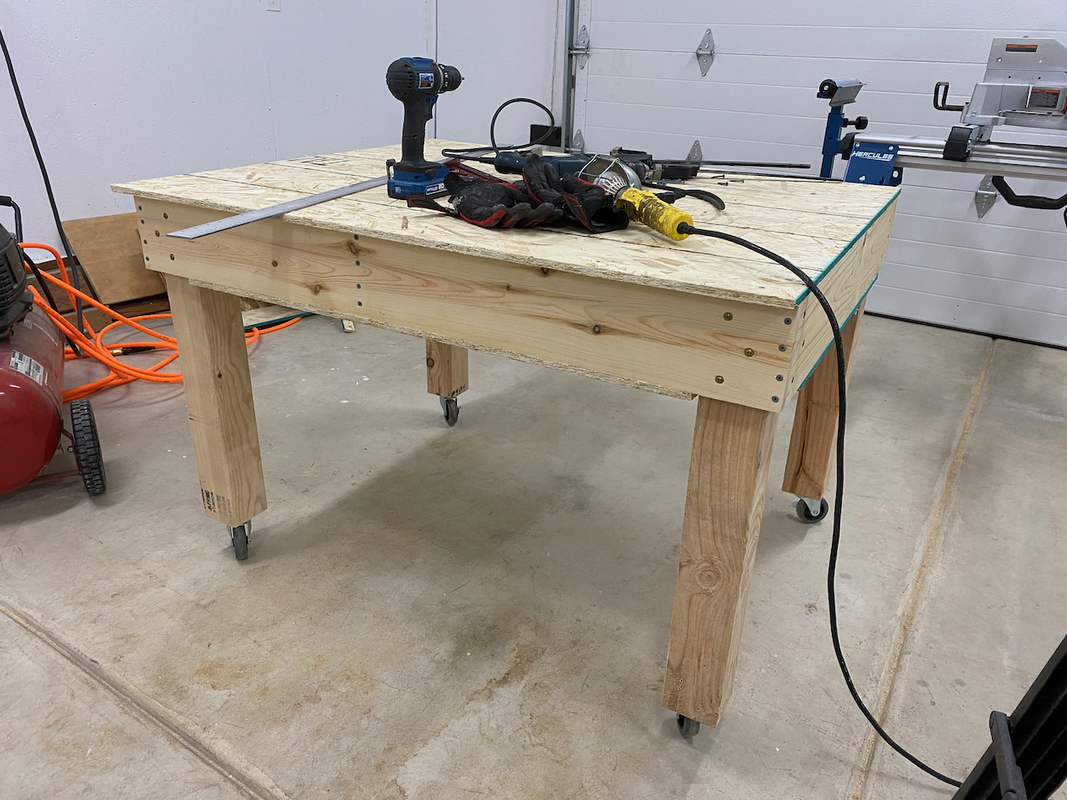
The first thing I did for the shop was to build my construction table. There are many ways of doing this. I went for a simpler box frame with corner bracing and cross supports. I made the top easily removable in the event I had damaged it too much. This may or may not be necessary, but it's good to have options. I also decided to build the table in two parts: one 4 x 8 foot and one 4 x 4 foot. This will give me some flexibility down the road if I need more space but don't need the full 12 feet.
The first thing I did for the shop was to build my construction table. There are many ways of doing this. I went for a simpler box frame with corner bracing and cross supports. I made the top easily removable in the event I had damaged it too much. This may or may not be necessary, but it's good to have options. I also decided to build the table in two parts: one 4 x 8 foot and one 4 x 4 foot. This will give me some flexibility down the road if I need more space but don't need the full 12 feet.
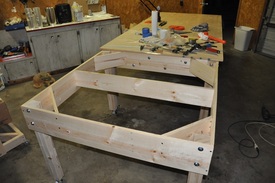
I also put the table up on height adjustable casters so that I could not only move the table around at will but also level it easily. It's come in very handy several times already. To attach the casters, I welded a nut to a flat piece of steel with three holes in it. The middle was for the caster stud, the other two were for screws to attach it to the bottom of the leg. I drilled out an area for the stud to fit into and installed the assembly. I added a nut to the stud to act as a thread lock. The trick with having two tables is that it is harder to level both sides, but I decided the effort would come in handy later. One problem I ran into was that my caster bent one time when I had it adjusted out quite a bit. So I've resolved to having it almost all the way in and will use spacers to do large changes and the caster for small changes.
EAA posted an article on building a work table using the metal studs that you find in a lot of business construction. The idea is that these are made to be straight and warp less with time. Had I thought about them the first time, I probably would have used those instead. If you can find the article, I would recommend going that route with the build.
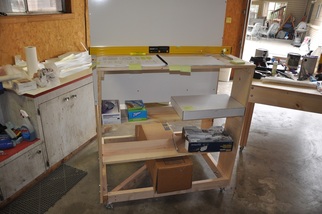
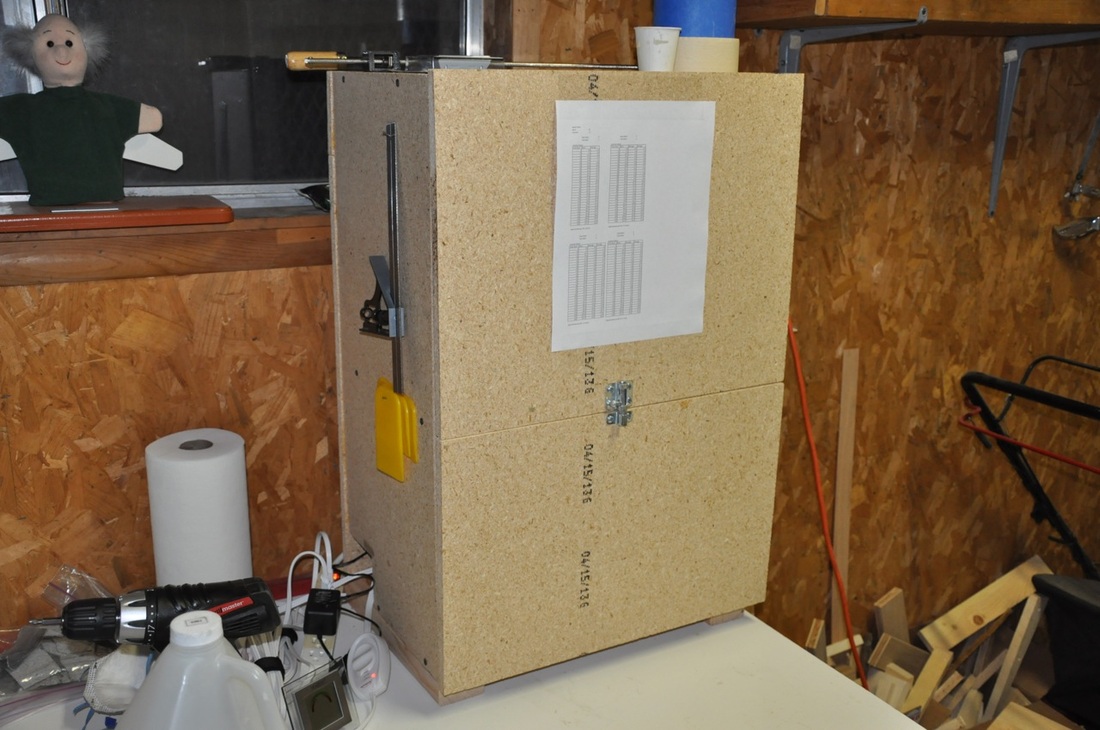
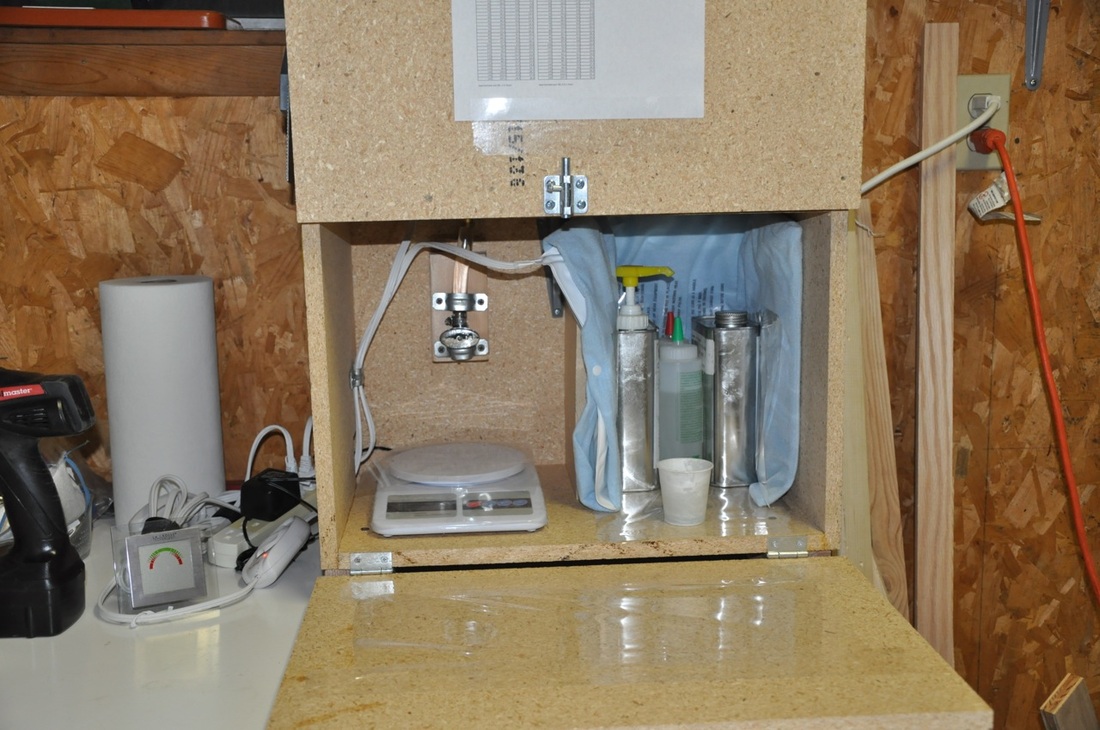
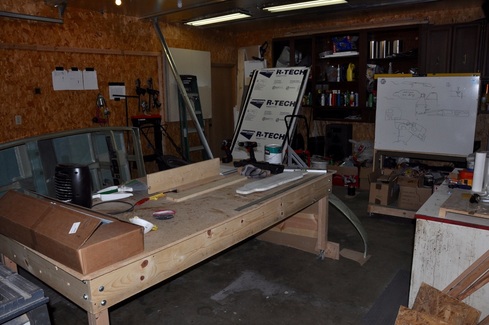
The next item on the list was construction of a fiberglass storage box. I considered permanently mounting it to a work table I had, but decided later to make a movable storage cabinet. This gives me some flexibility in where I can have the cabinet and I can leave the table more open for other things when needed. I also installed shelves to hold items for the build as well as a spot to lay the plans to read. The cabinet has a door that keeps the glass sealed from dust, but drops down to be a cutting table with guide lines on the surface for cutting angles. The door material is dry erase, so I can use it to draw out things when needing to figure something out. This has worked well, though the cutting table portion is on the short side. I've made it work, but I have thought about making an extension. We'll see how things go. The fiberglass hangs on large dowels so it can be pulled down from the roll. I need to add rollers to aid in the turning, but overall this has worked well. You can see more pictures in Tools And Shop Setup.
The epoxy system I chose to use is the MGS system. This is suppose to have some of the best properties (low viscosity, low odor, high softening temp, etc...) This system also has a unique property of allowing the user to pick a cure time by mixing fast and slow hardener with times between 15 minutes to 6 hours. The biggest issue is that the slow hardener must ship in packaging that costs more than the material does and MGS can have supply issues sometimes. If you can go straight to the supply store, then you could save on the shipping. The other thing that helps is using mostly fast hardener with small amount of slow. I found that I was using more slow hardener than I really needed to.
When it came to building the heat box that you see everyone doing, I decided to follow Jerry Schneider and use heating pads instead of light. That way the heat is focused to where it's needed and you're using all the electricity to make heat and not wasting some to light. I just kept the pads on low and this seemed to be sufficient. I also followed his idea of making a resin dispenser and leaving the hardener in the cans. We'll see how this works out, but I have no reason to believe it won't. I tried using the West Pumps on the hardeners, but the hardener kept crystallizing in the tubes and spouts. By leaving it in the can and just pouring out what's needed, this should avoid that issue.
When it came to building the heat box that you see everyone doing, I decided to follow Jerry Schneider and use heating pads instead of light. That way the heat is focused to where it's needed and you're using all the electricity to make heat and not wasting some to light. I just kept the pads on low and this seemed to be sufficient. I also followed his idea of making a resin dispenser and leaving the hardener in the cans. We'll see how this works out, but I have no reason to believe it won't. I tried using the West Pumps on the hardeners, but the hardener kept crystallizing in the tubes and spouts. By leaving it in the can and just pouring out what's needed, this should avoid that issue.

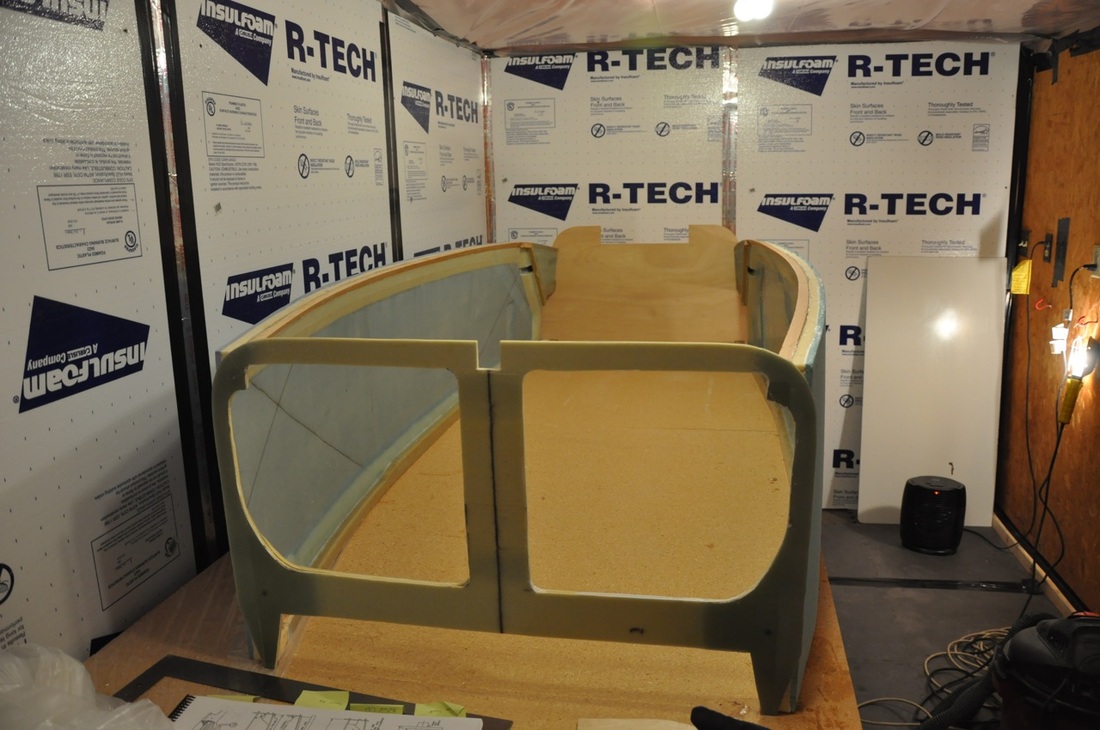
One thing every builder should prepare for ahead of time is cold weather. Composites do not like working below 70ºF. Most instances of trapped air in the layup (including my own) have come from temperature getting too cold. Unfortunately, I was hit hard when the winter weather showed up sooner than expected and I had to scrap an entire side because of trapped air. Things get cold in the Salt Lake area, so to build through the winter, drastic measures must be taken. The shop is rather large and minimally insulated. There is also only electricity to feed it (no gas lines), so heating the entire area could be costly. In order to continue building, a temperature controlled environment had to be set up. This appears to be building a small insulated heated area to do the work in and curing. I designed a structure in Google Sketchup (I don't have access to a CAD program) that made an area small enough to easily heat but large enough to work in. This was constructed with 2x3 studs to keep the cost down. I then attached 6 mil plastic sheet to both sides of the studs to create an insulated gap. I then used insulated ducting to duct my 220V heater over to the room. Despite all this, it wasn't enough and my heat loss was too great. So I upgraded the area by adding fiberglass mats to the ceiling where most heat would be lost and covering the walls with Styrofoam insulation sheets. I graphed temperature over time using different heat sources and found my 220V heater, which was on the other side of the shop and had to be ducted in, just wasn't working well. It would probably work wonderfully in the room, but I don't have a 220V outlet there. A propane heater that attaches directly to the bottle can get the room up to temp in about 30 minutes, though it produces some moisture. I don't stay in the room while it's heating since there could be air issues, so it's used as a preheater. I then switch to a standard 120V heater which was able to maintain and even increase the heat in the room. I was at 72ºF while outside temp was 29ºF. The room still decays in heat faster than I like, but at least it's adequate. The electric heater makes it safer to work in the room as well. This combination allows for quicker startup. An electric blanket on the parts to be glassed would aid in preheating the material ahead of time.


Shop Update
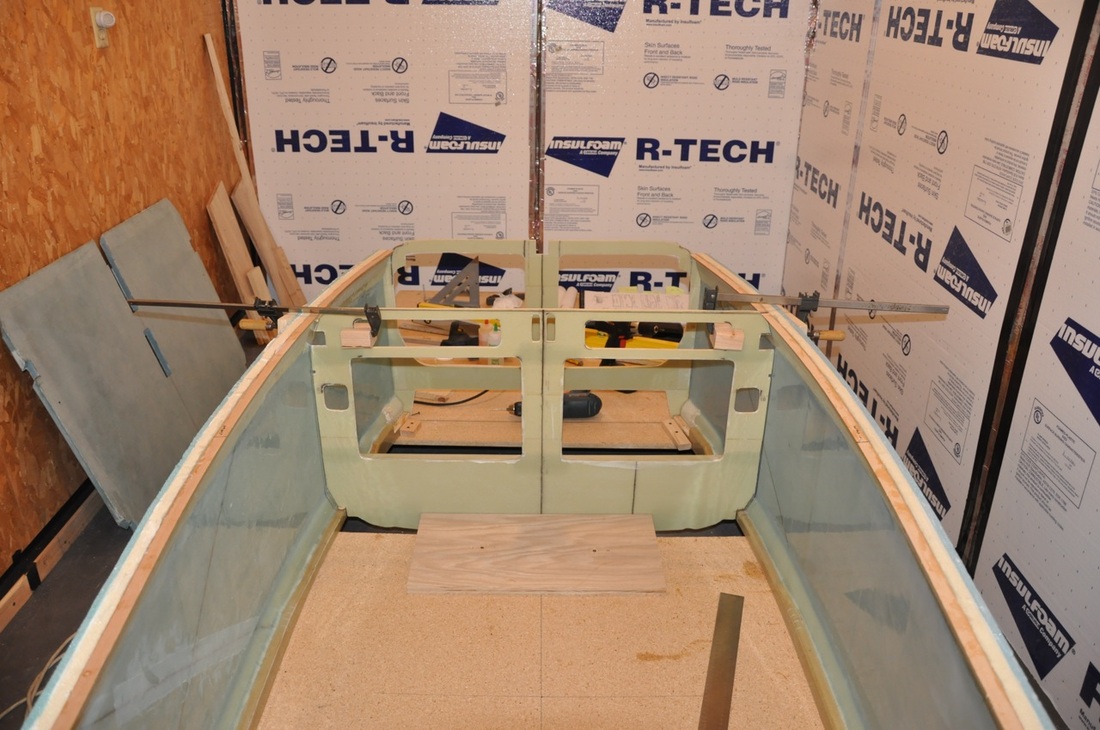
The project was starting to take up too much space in the heat room since I'm now having to work on multiple pieces. As such, it was time to expand the work area. So the walls came down and work was set to insulate the ceiling and walls better. For the ceiling, I used metal studs from the home improvement store to re-enforce the foam boards on the ceiling so they could hold the R-38 fiberglass insulation that I put in. With the foam, this will give me a near R-40 insulation. For the walls, I had someone come in and blow in fiberglass since the walls were finished and I couldn't install batting. I wanted to do the urethane foam injection, but the cost was prohibitive. Hopefully this will work well for the winter time, but time will tell.
The project was starting to take up too much space in the heat room since I'm now having to work on multiple pieces. As such, it was time to expand the work area. So the walls came down and work was set to insulate the ceiling and walls better. For the ceiling, I used metal studs from the home improvement store to re-enforce the foam boards on the ceiling so they could hold the R-38 fiberglass insulation that I put in. With the foam, this will give me a near R-40 insulation. For the walls, I had someone come in and blow in fiberglass since the walls were finished and I couldn't install batting. I wanted to do the urethane foam injection, but the cost was prohibitive. Hopefully this will work well for the winter time, but time will tell.
Practice Pieces
Once the shop was in order and Chapter 3 had been read a few times, it was time to give things a try. The first thing I did was take small pieces and wet out glass on top of plastic. It was minimal material to keep cost down and just gave me an idea of what to expect. It also allowed the plastic peel ply method to be tested.
The next piece is the 6 plies of BID cut into retangular pieces. No foam in this one. This project allows you to get use to wetting out glass, adding more layers, and removing bubbles. It also will help to educate on how well your resin to glass ratio is. Once the piece has cured, it gets cut to a specific dimension (12" x 16" I believe) and then weighed to find the total weight. The plans will have a weight range that the piece should fall in and will let you know if you're too wet, too dry, or within target. It also says to hold onto it for later, but it doesn't say why. Apparently, this is to become the main wing vortilons later on.
The next practice piece involves cutting a piece of PVC foam out, shaping it, then laying up four layers of glass on each side of the piece: 2 UNI and 2 BID per side. Once cured, it gets trimmed, then strength tested by placing it on an edge or a broom handle and applying weight to both ends. 200 lbs of force on the piece equates the force of a 10 G crash. If this doesn't build confidence, I don't know what will. Couple of things I learned doing this piece. One is that I needed to round the foam more on edges to get the glass to lay right. The other was that I made the micro too dry and had a hard time spreading it thin and even. I wasn't happy with the work, so I redid with a smaller piece of scrap and was much more pleased with the results. I decided I was ready for building even though there were other practice pieces, but I was anxious to get on with things.
With that, it was on to the build!
Once the shop was in order and Chapter 3 had been read a few times, it was time to give things a try. The first thing I did was take small pieces and wet out glass on top of plastic. It was minimal material to keep cost down and just gave me an idea of what to expect. It also allowed the plastic peel ply method to be tested.
The next piece is the 6 plies of BID cut into retangular pieces. No foam in this one. This project allows you to get use to wetting out glass, adding more layers, and removing bubbles. It also will help to educate on how well your resin to glass ratio is. Once the piece has cured, it gets cut to a specific dimension (12" x 16" I believe) and then weighed to find the total weight. The plans will have a weight range that the piece should fall in and will let you know if you're too wet, too dry, or within target. It also says to hold onto it for later, but it doesn't say why. Apparently, this is to become the main wing vortilons later on.
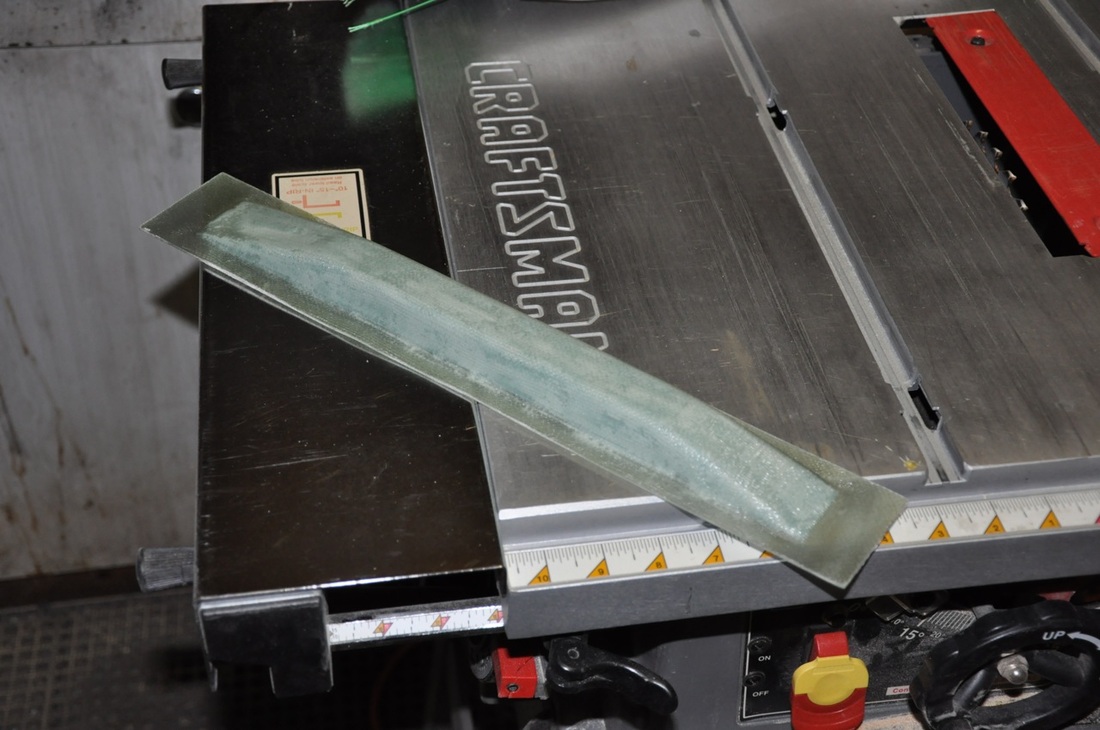
The next practice piece involves cutting a piece of PVC foam out, shaping it, then laying up four layers of glass on each side of the piece: 2 UNI and 2 BID per side. Once cured, it gets trimmed, then strength tested by placing it on an edge or a broom handle and applying weight to both ends. 200 lbs of force on the piece equates the force of a 10 G crash. If this doesn't build confidence, I don't know what will. Couple of things I learned doing this piece. One is that I needed to round the foam more on edges to get the glass to lay right. The other was that I made the micro too dry and had a hard time spreading it thin and even. I wasn't happy with the work, so I redid with a smaller piece of scrap and was much more pleased with the results. I decided I was ready for building even though there were other practice pieces, but I was anxious to get on with things.
With that, it was on to the build!

The New Shop Build
In 2018, the family made the decision to move from our original home in Salt Lake to a new home in Portland. As with any move, it was hard, time consuming, and really set things back. Unfortunately, Portland does not have a lot of houses with shops or even space for shops. It took several months of looking in order to find the right house that at least had room for a shop. Once we moved in, we started talking to builders who said we had to get a survey, couple months later we have a survey. Then we needed architect plans, several months later we had plans. Then waited for quotes to come in. We were getting quotes of $100,000 or more just to build a shop! Apparently Portland is an expensive place to build. After deciding what to do next, we decided to build the shop ourselves and contracting out the parts that were too much for us to do. So I started the process of learning to be a contractor. First item was to get the site plan done. In this process we found out there's a 20ft radius circle setback that was right where a corner of the shop was suppose to go! Now the plans had to be changed. Not wanting to wait forever and pay another chunk of money, I decided to make the plans myself using the original as a guide.
With the plans done and the site plan marked, I started the permit process. The utilities were marked by the location services and all was good expect for one mark that went straight across the front of the shop. It didn't make sense to be there because there was a utility easement for these things, however, I feared it would slow things down. After calling the utilities, no one was claiming this line, so I guess we'll see what happens.
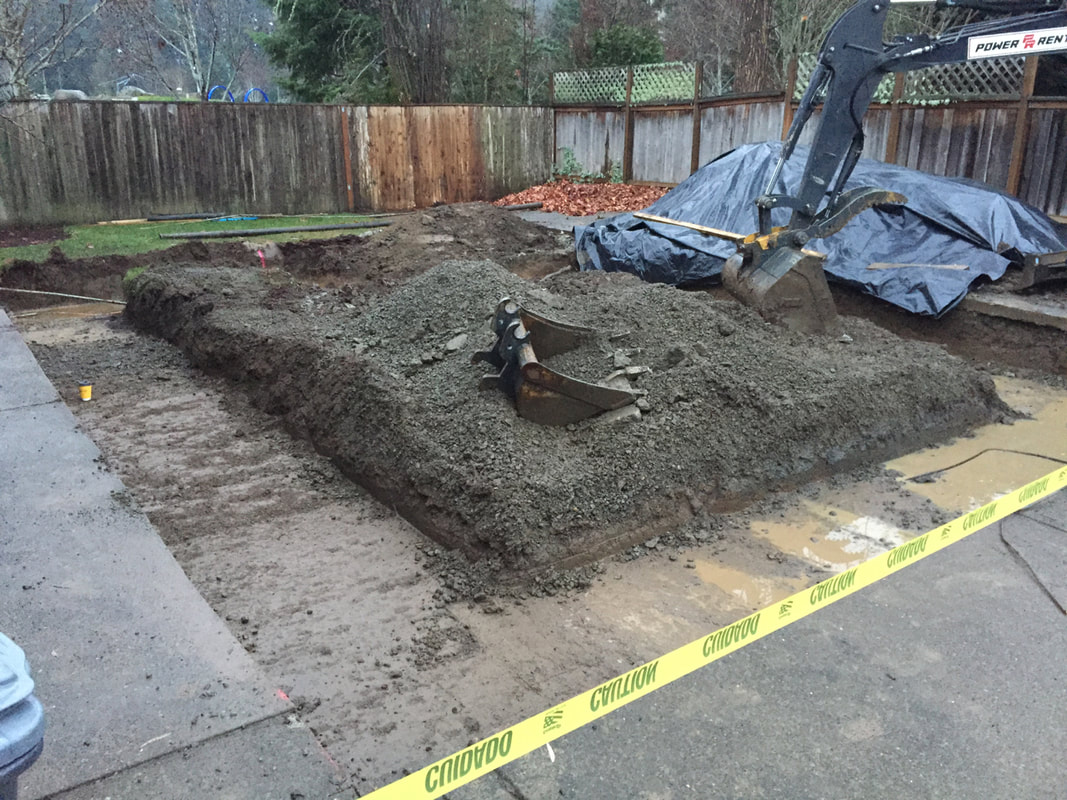
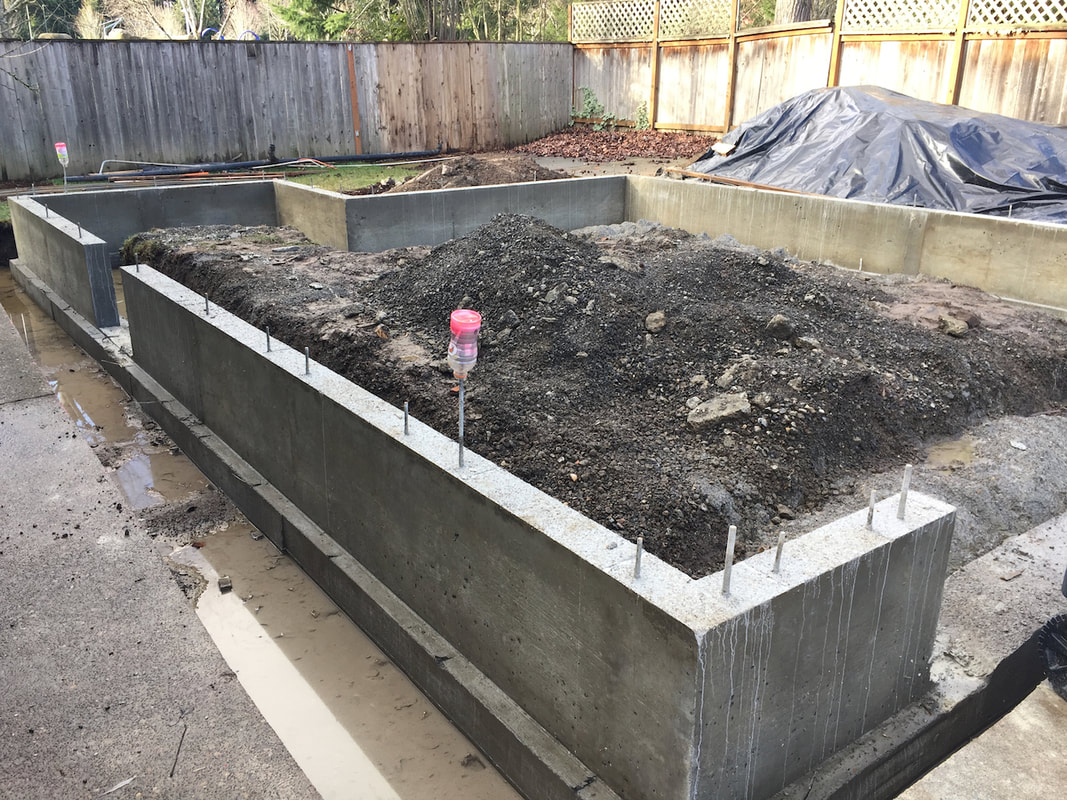
First up was taking down the original shed that was in the spot where we wanted the shop. This was far too small to build in, not even big enough for a car. I offered it up free to anyone that could take it away. Once it was gone, we got a foundation contractor in to start putting in the foundation. After digging the trenches for the stem wall, we found out that the line was a piece of romex that was buried, no power to it. It must have picked up the tracing signal when they were marking. So far so good. The foundation people were then able to put in the forms for the walls.
In 2018, the family made the decision to move from our original home in Salt Lake to a new home in Portland. As with any move, it was hard, time consuming, and really set things back. Unfortunately, Portland does not have a lot of houses with shops or even space for shops. It took several months of looking in order to find the right house that at least had room for a shop. Once we moved in, we started talking to builders who said we had to get a survey, couple months later we have a survey. Then we needed architect plans, several months later we had plans. Then waited for quotes to come in. We were getting quotes of $100,000 or more just to build a shop! Apparently Portland is an expensive place to build. After deciding what to do next, we decided to build the shop ourselves and contracting out the parts that were too much for us to do. So I started the process of learning to be a contractor. First item was to get the site plan done. In this process we found out there's a 20ft radius circle setback that was right where a corner of the shop was suppose to go! Now the plans had to be changed. Not wanting to wait forever and pay another chunk of money, I decided to make the plans myself using the original as a guide.
With the plans done and the site plan marked, I started the permit process. The utilities were marked by the location services and all was good expect for one mark that went straight across the front of the shop. It didn't make sense to be there because there was a utility easement for these things, however, I feared it would slow things down. After calling the utilities, no one was claiming this line, so I guess we'll see what happens.
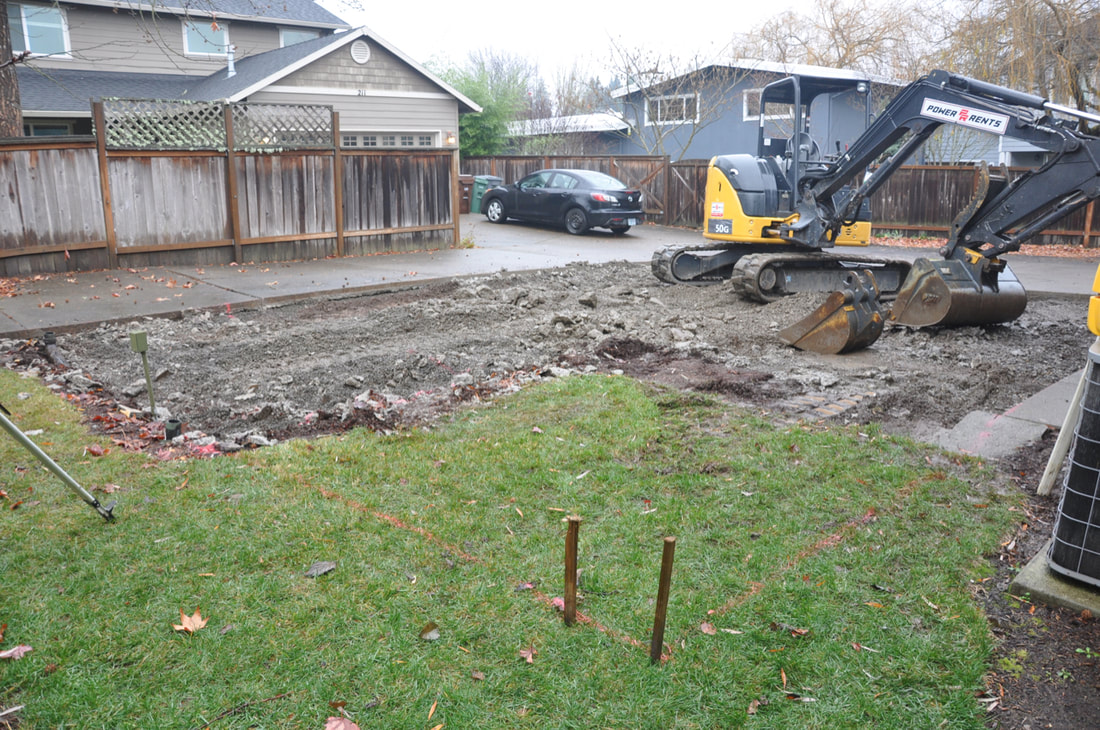
First up was taking down the original shed that was in the spot where we wanted the shop. This was far too small to build in, not even big enough for a car. I offered it up free to anyone that could take it away. Once it was gone, we got a foundation contractor in to start putting in the foundation. After digging the trenches for the stem wall, we found out that the line was a piece of romex that was buried, no power to it. It must have picked up the tracing signal when they were marking. So far so good. The foundation people were then able to put in the forms for the walls.

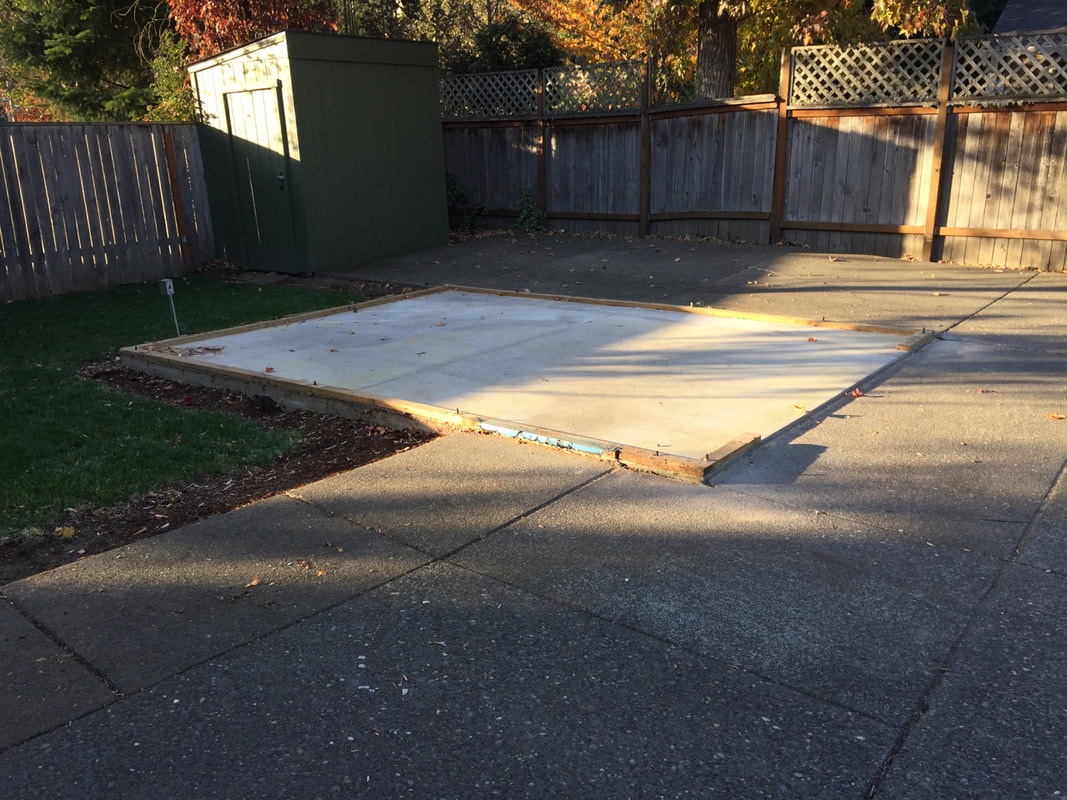
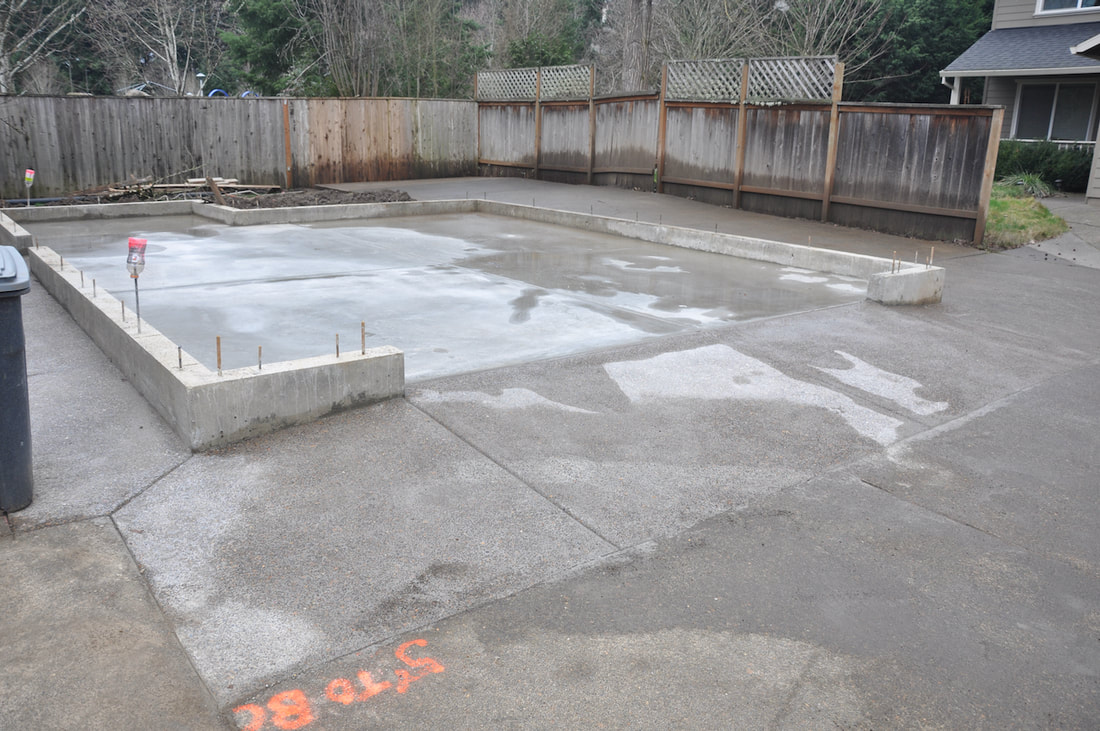
The foundation was able to be poured and setup. Once a week passed, we were able to begin on framing. Here's where something interesting happened. I haven't really been nervous about the plane build, but getting ready to do framing when I've never done it before actually made me nervous. However, my wife and I pushed through the cold and rain and started nailing together studs and raising walls one at a time. Most of the walls went out without too much difficulty except one. One of the heaviest did fall down some onto the house (all be it slowly) and did end up on our toes. We were wearing steel toed shoes so everyone was okay and we got the wall back up. No damage other than prides and maybe a bruise or two, but then the wall was in place.
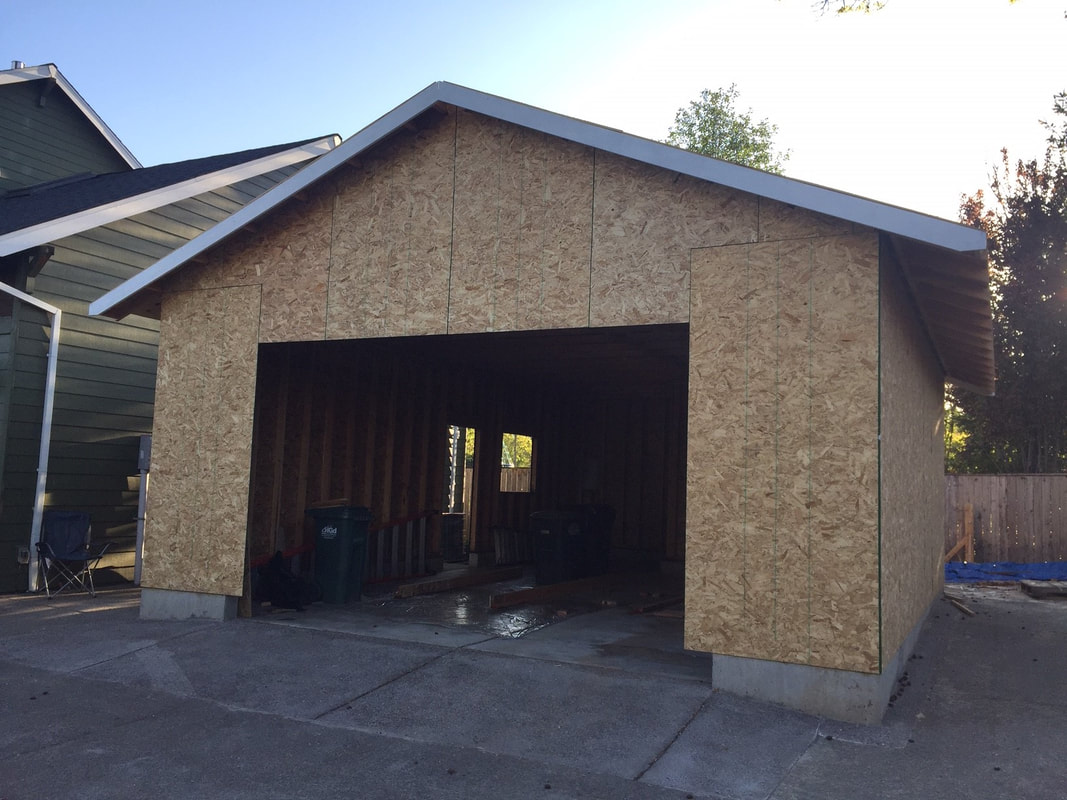
With all the walls in place, we moved on to trusses. Another nervous moment due to the side and height of these things. However, we devised a system for getting them into place that worked pretty well. At this point I start to see a lot of the places where things weren't as straight as we thought they were. Oh well, can't do much now. We charge on and get the last trusses up. Next was roof sheathing. It was a little tricky to move sheets of plywood up onto the roof but eventually got there. I had someone else do the roof since it was inexpensive enough. Once the roof was in place, we no longer had to worry about the wet Oregon weather here. This also marked the end of the framing job!
After the roof is up, it now time to put in the electrical. I had an electrician run the main power from the house to the subpanel in the shop. We ran 100 amp service to ensure I had enough out in the shop. As for how the electrical was distributed, I ran 240V circuits for a heater, a mini split system, and for outlets to plug tools into (3 circuits total). I ran two separate 120V circuits for outlets so that I could put every other outlet on a different circuit. This allows easy access to another outlet in case the first circuit trips. Lighting is up next.
With all the walls in place, we moved on to trusses. Another nervous moment due to the side and height of these things. However, we devised a system for getting them into place that worked pretty well. At this point I start to see a lot of the places where things weren't as straight as we thought they were. Oh well, can't do much now. We charge on and get the last trusses up. Next was roof sheathing. It was a little tricky to move sheets of plywood up onto the roof but eventually got there. I had someone else do the roof since it was inexpensive enough. Once the roof was in place, we no longer had to worry about the wet Oregon weather here. This also marked the end of the framing job!
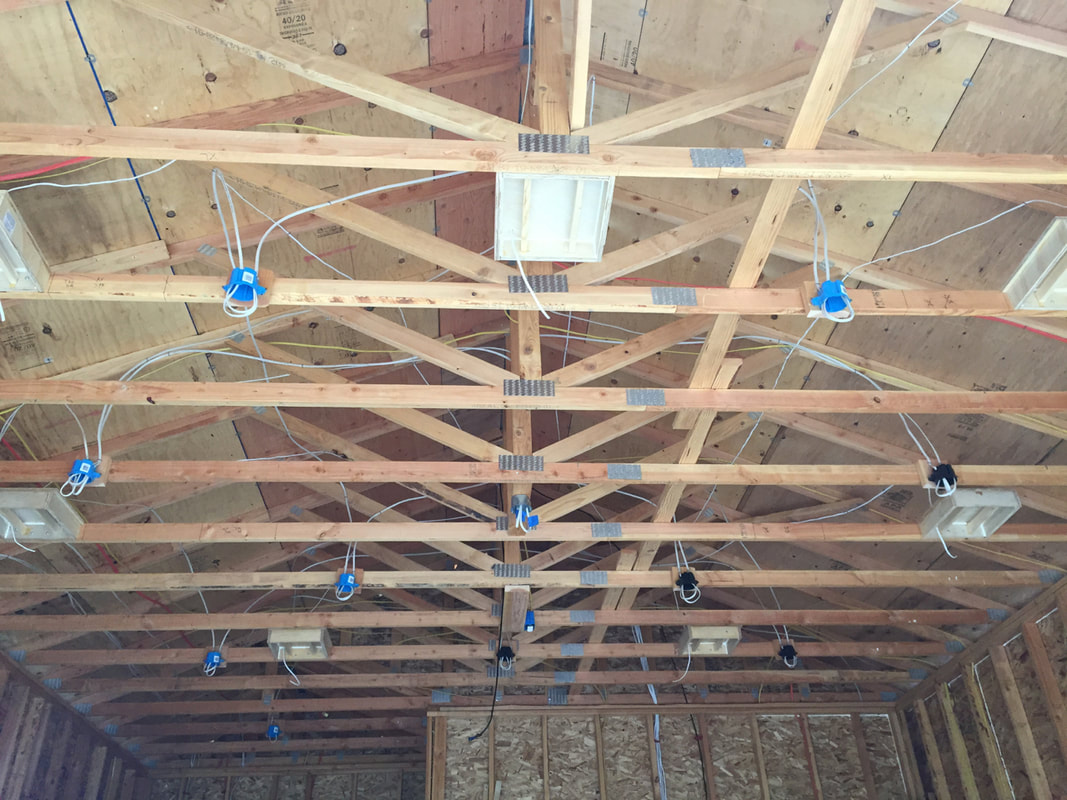
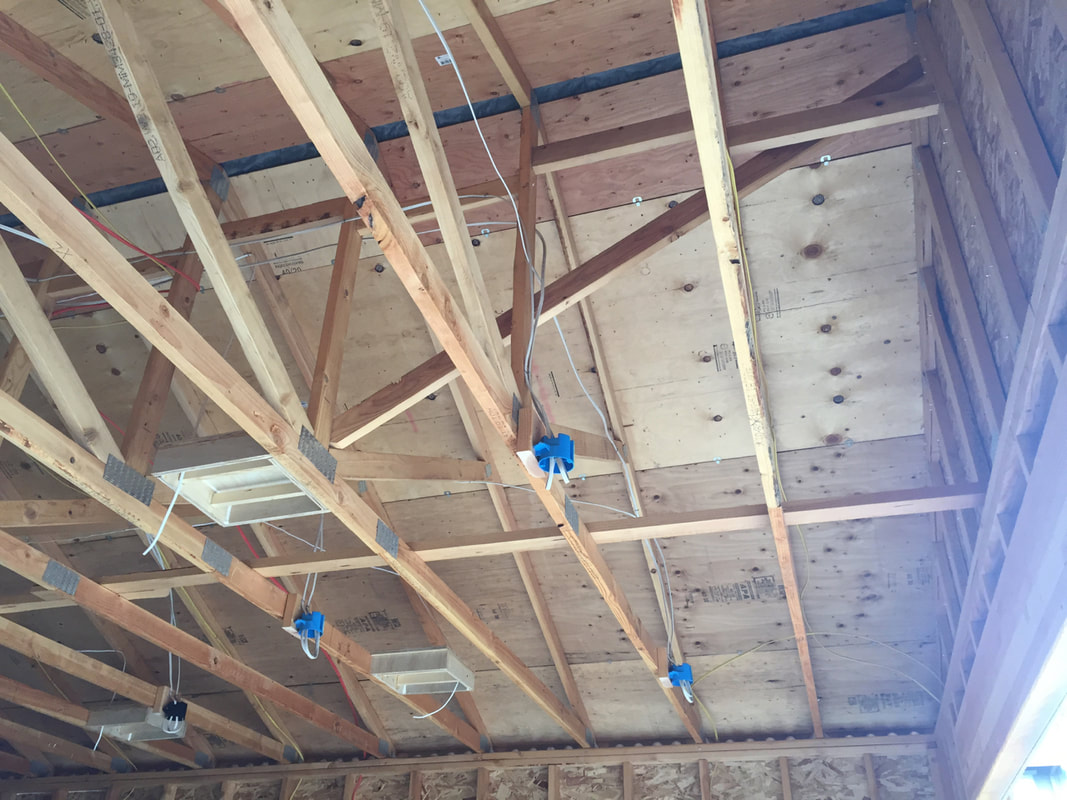
After the roof is up, it now time to put in the electrical. I had an electrician run the main power from the house to the subpanel in the shop. We ran 100 amp service to ensure I had enough out in the shop. As for how the electrical was distributed, I ran 240V circuits for a heater, a mini split system, and for outlets to plug tools into (3 circuits total). I ran two separate 120V circuits for outlets so that I could put every other outlet on a different circuit. This allows easy access to another outlet in case the first circuit trips. Lighting is up next.


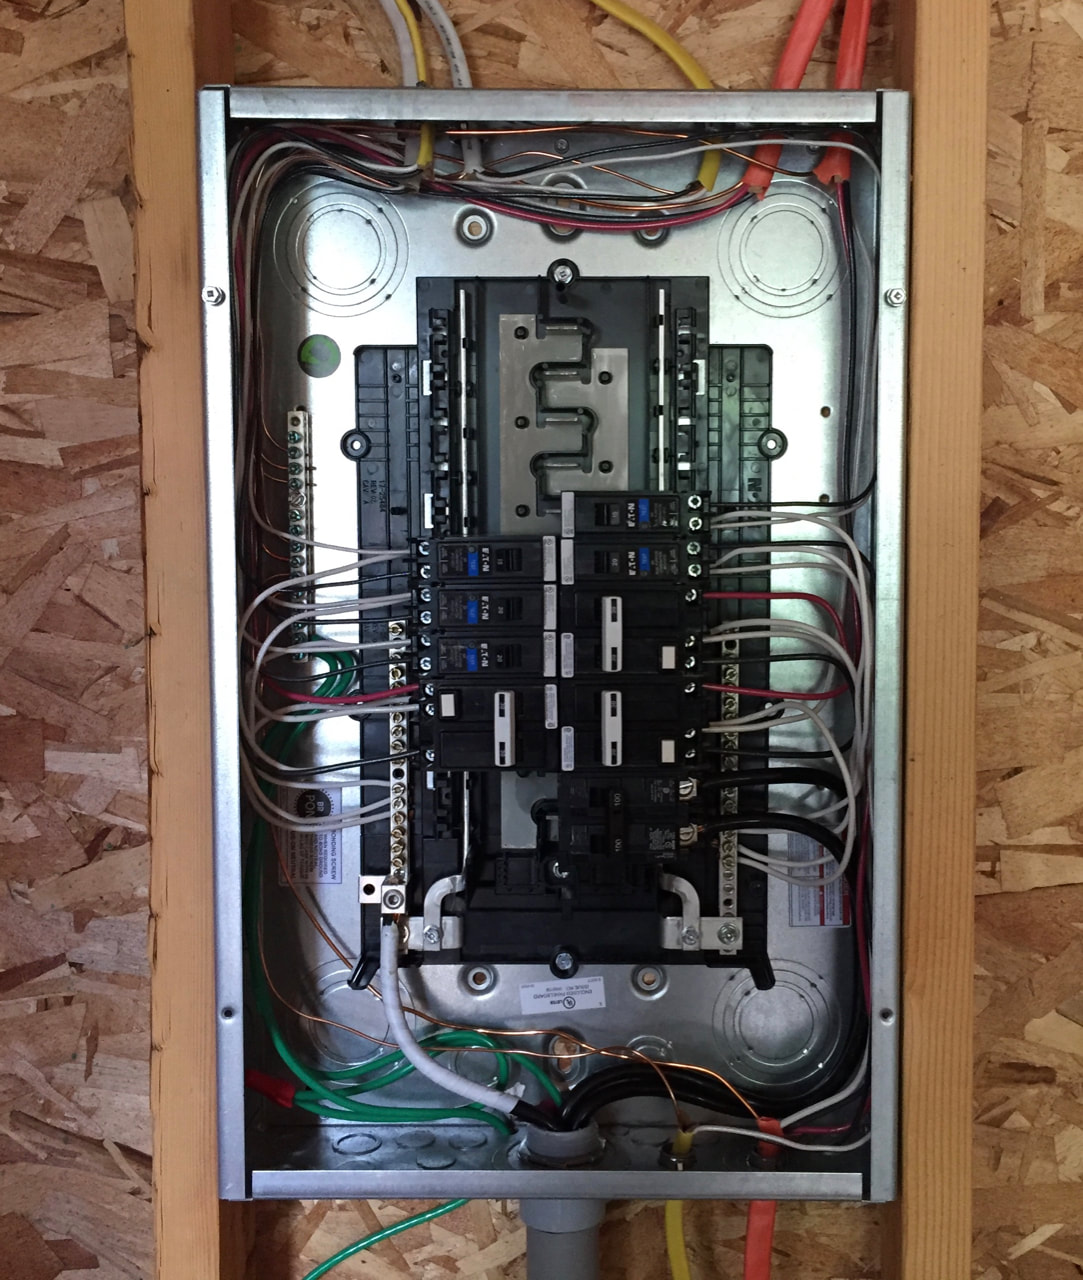
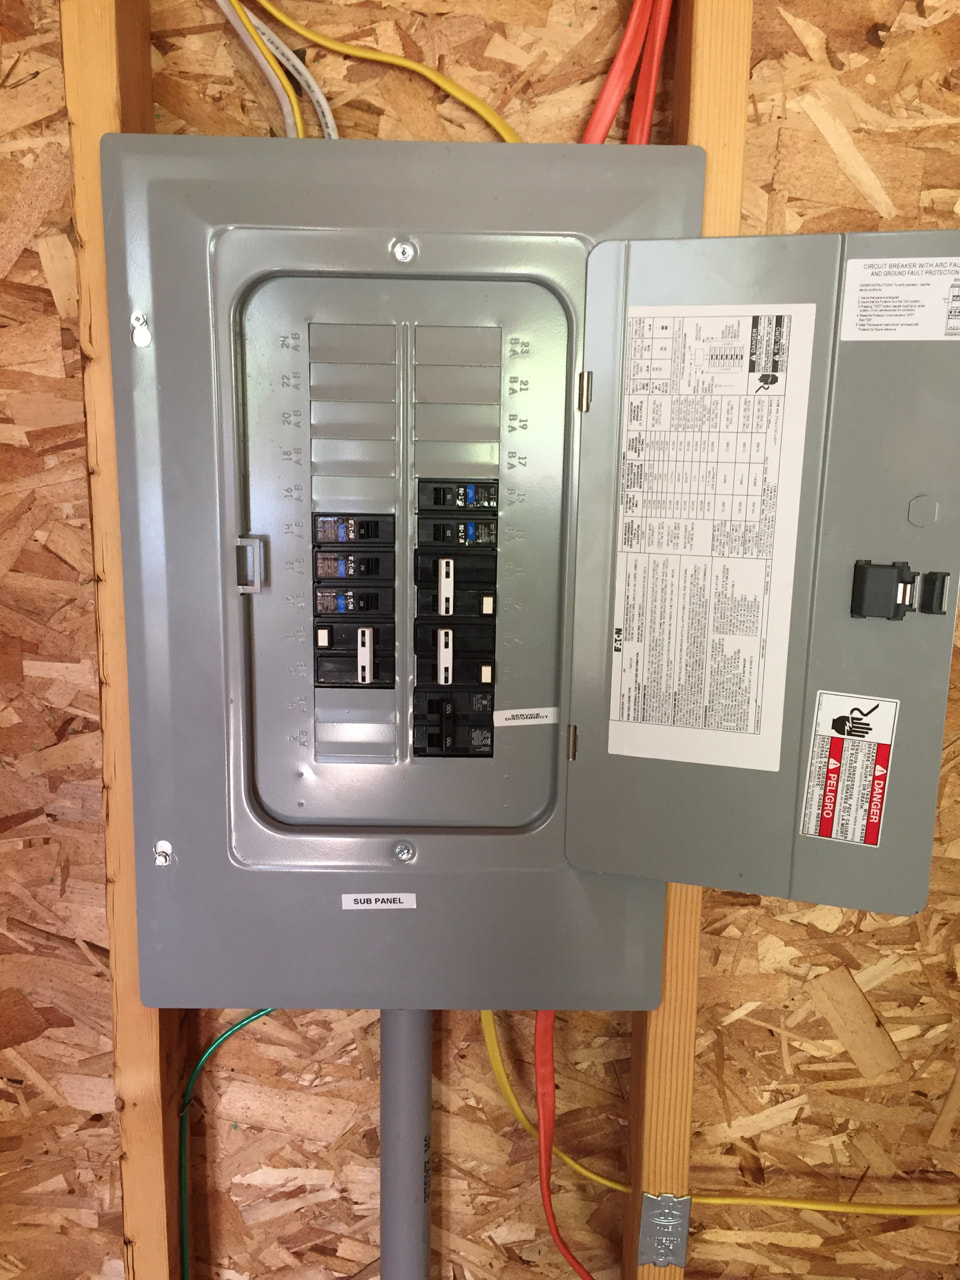
With the electrical panel in place, we started running all the wire. Doing my best to keep the wire as clean as possible, the circuits were layed out for the fewest branches, fewest holes through studs, and trying to keep the line lengths down. It's difficult when you're limited on where you can run though. While at it, wires for speakers and HDMI were run to allow for a home theater that we didn't have room for in the house. The speakers will be ceiling mounted along with the projector. With the wiring in, we got our electrical and framing inspection which both passed!
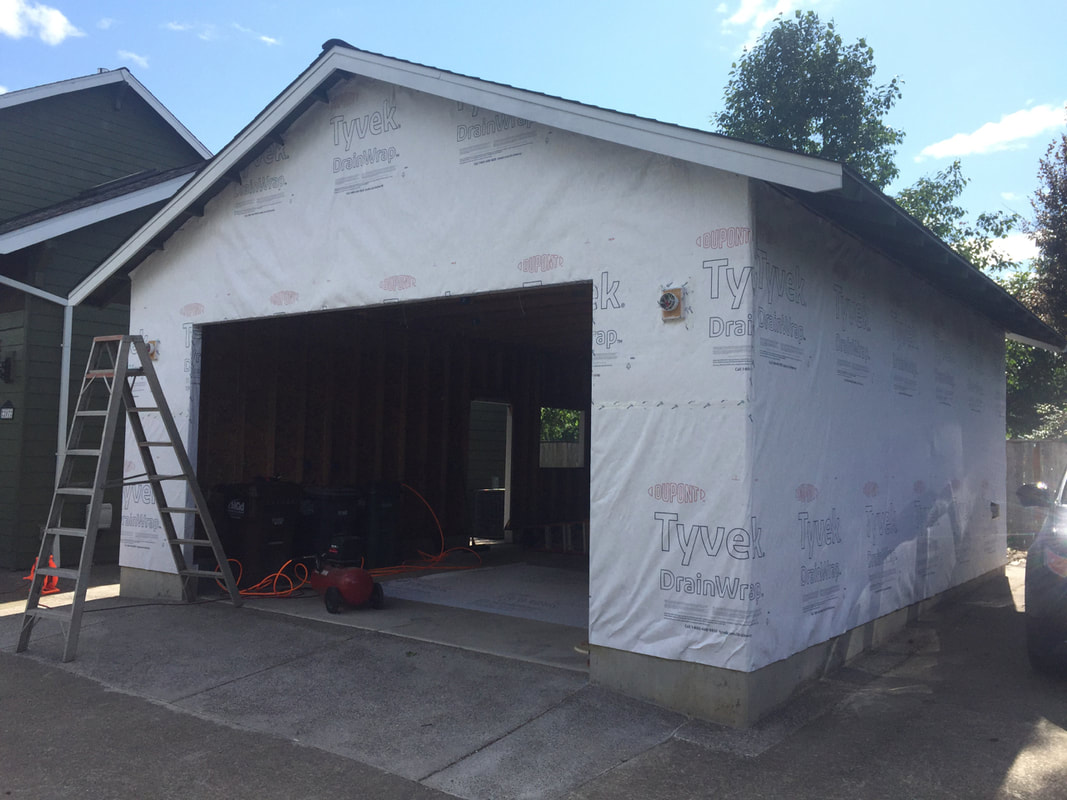
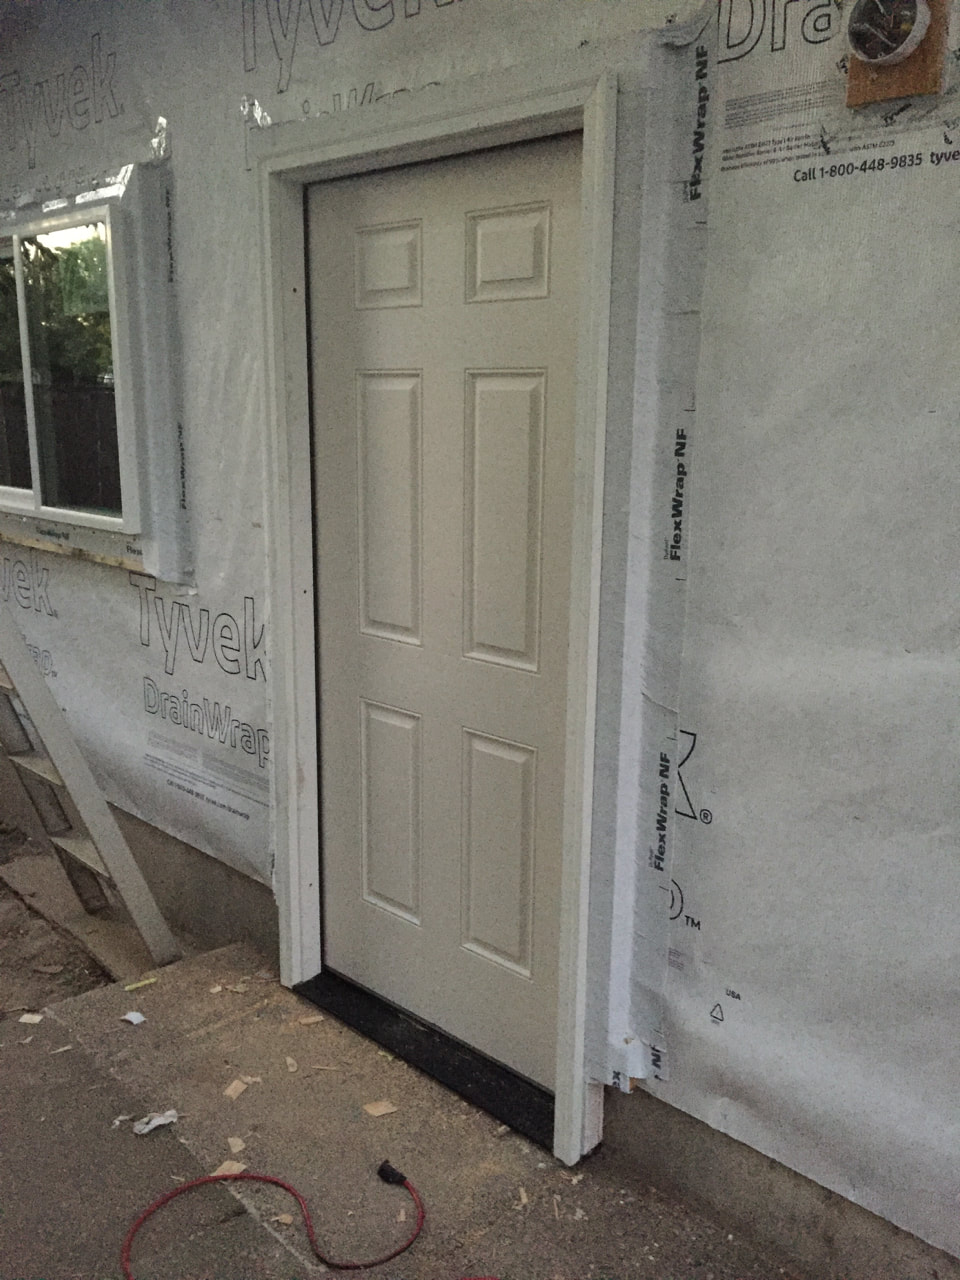
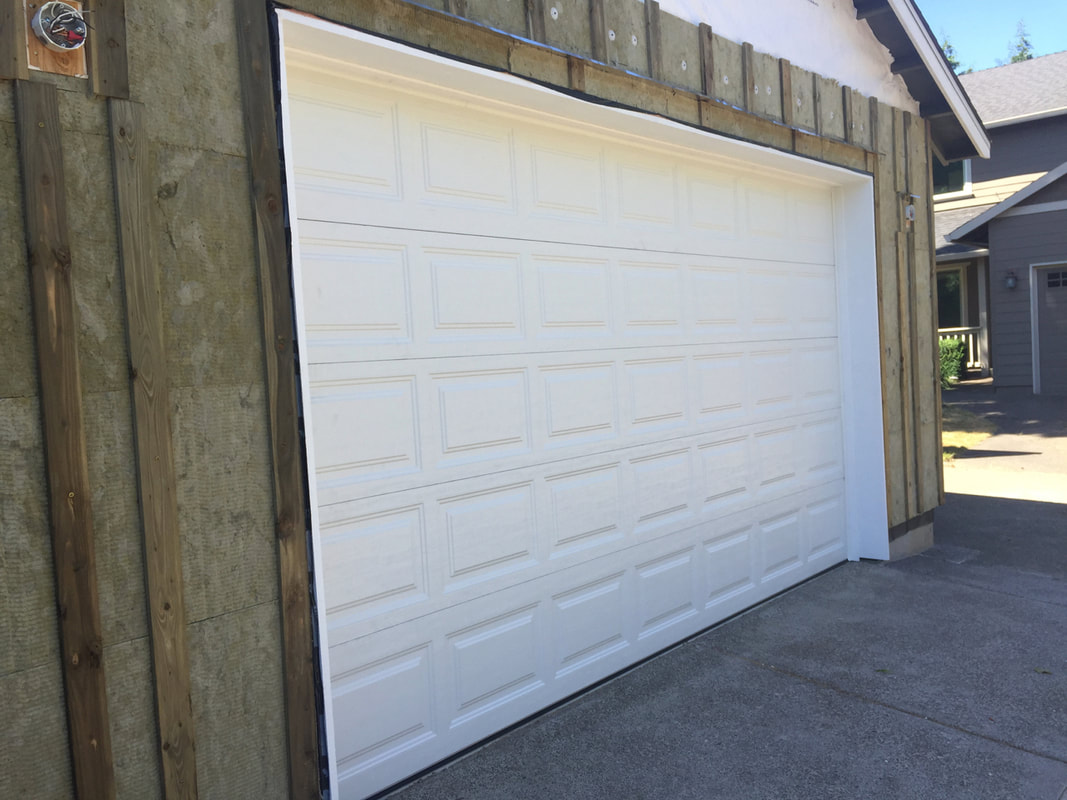
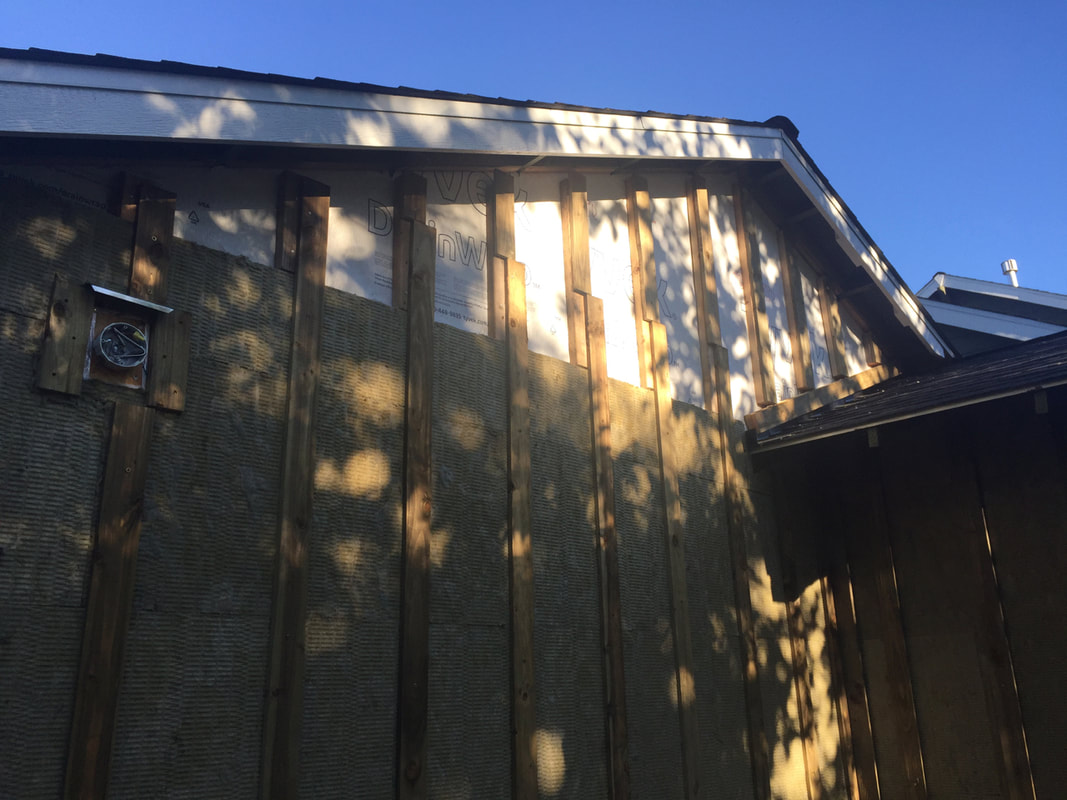
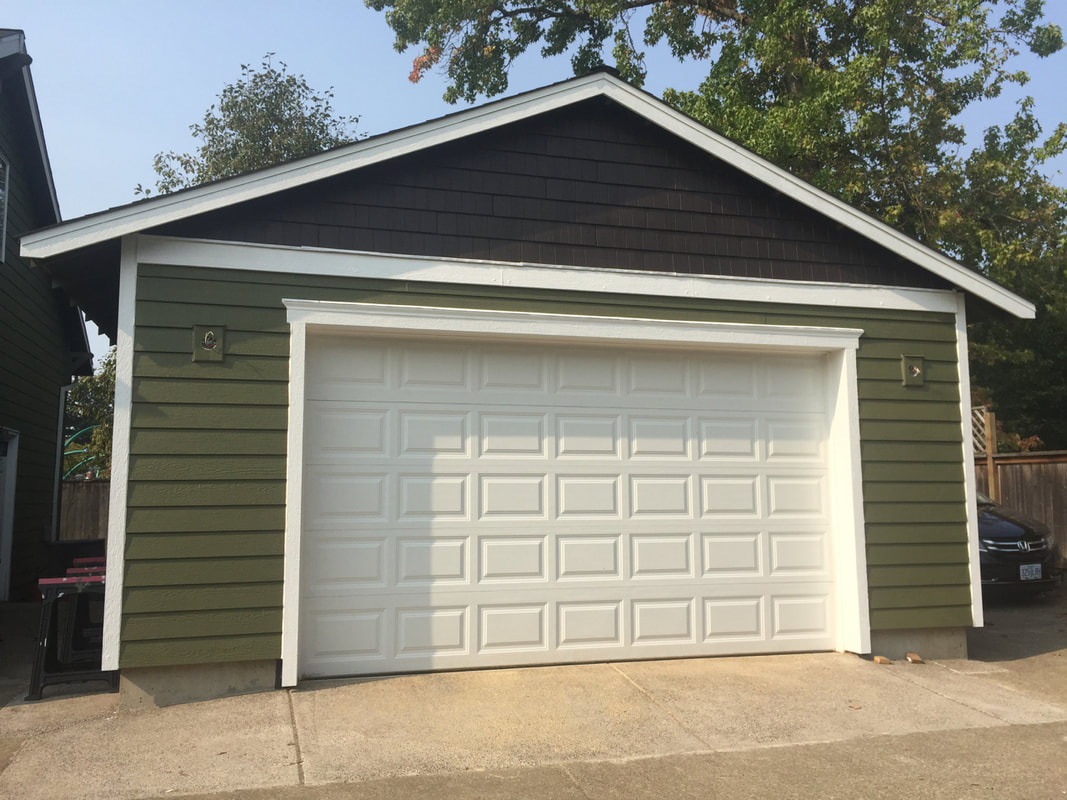
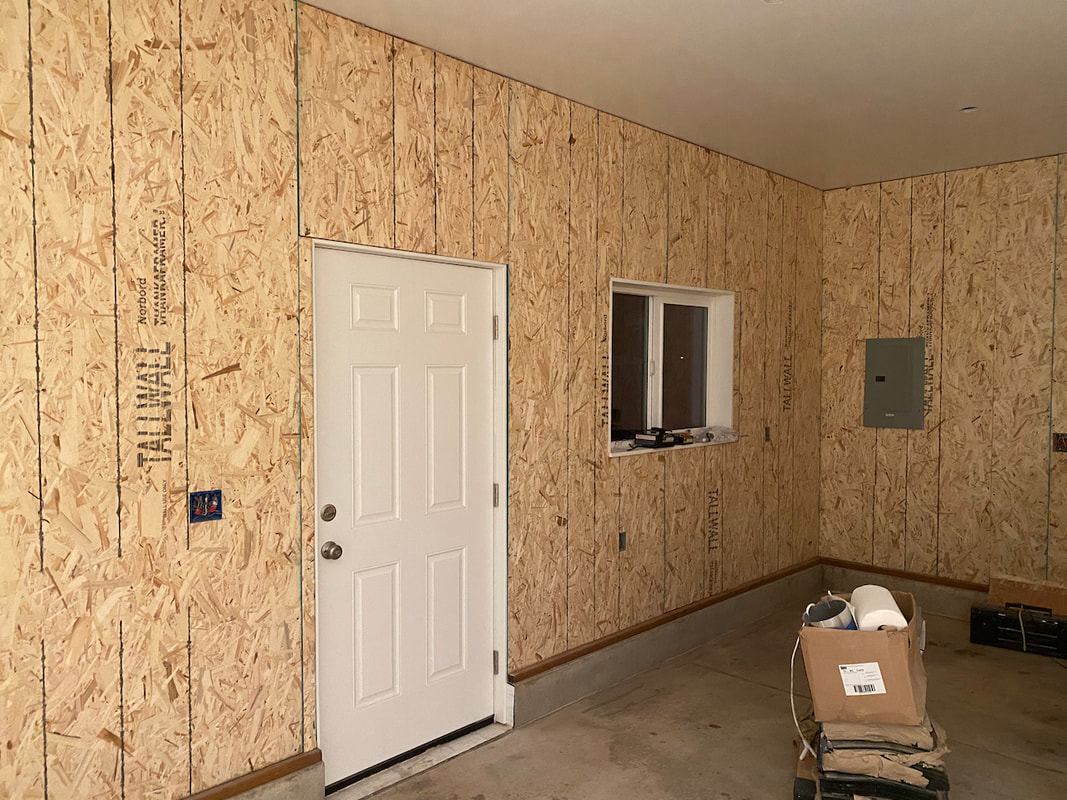
Next up was wrapping the shop which was a bit harder than thought. We had drain wrap which was flexible some so trying to mount straight was difficult. The garage door was going to install soon, so we had to get the trim and framing in. We also were able to install our first ever window and entry door. The window went well, but the door was an issue because the cement floor reduced the height. After hacking at the header enough to clear, the door was able to go in (hidden message, it was an absolute pain).
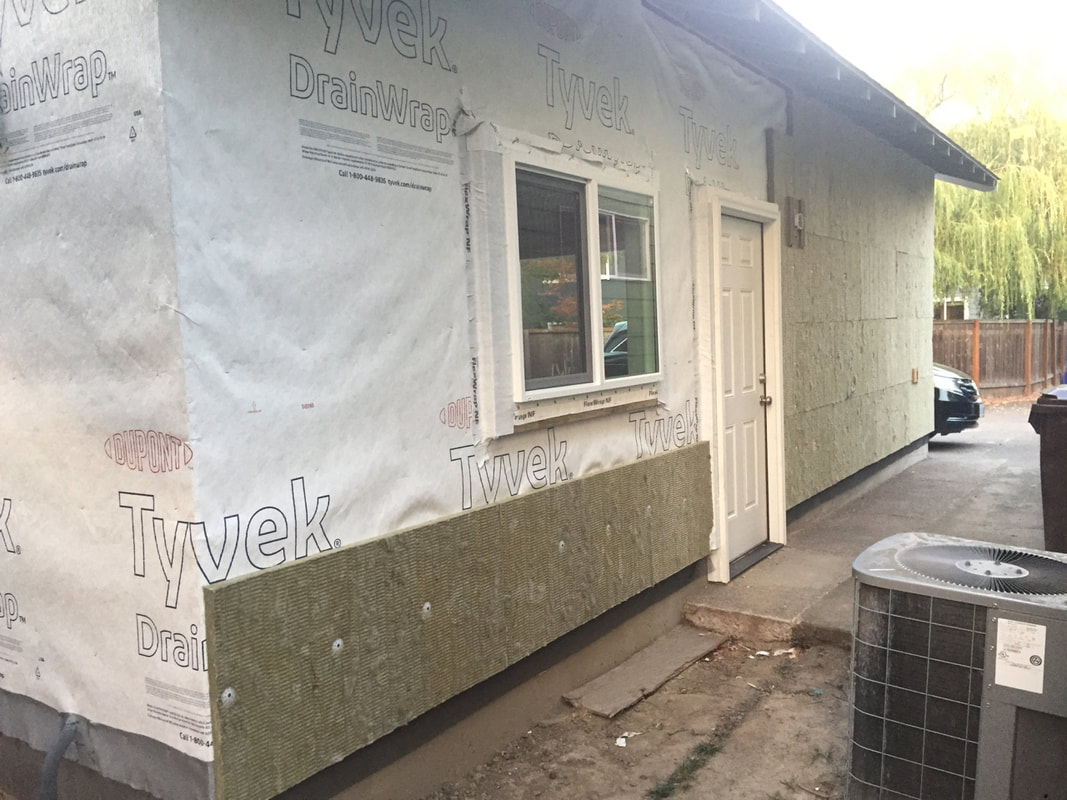
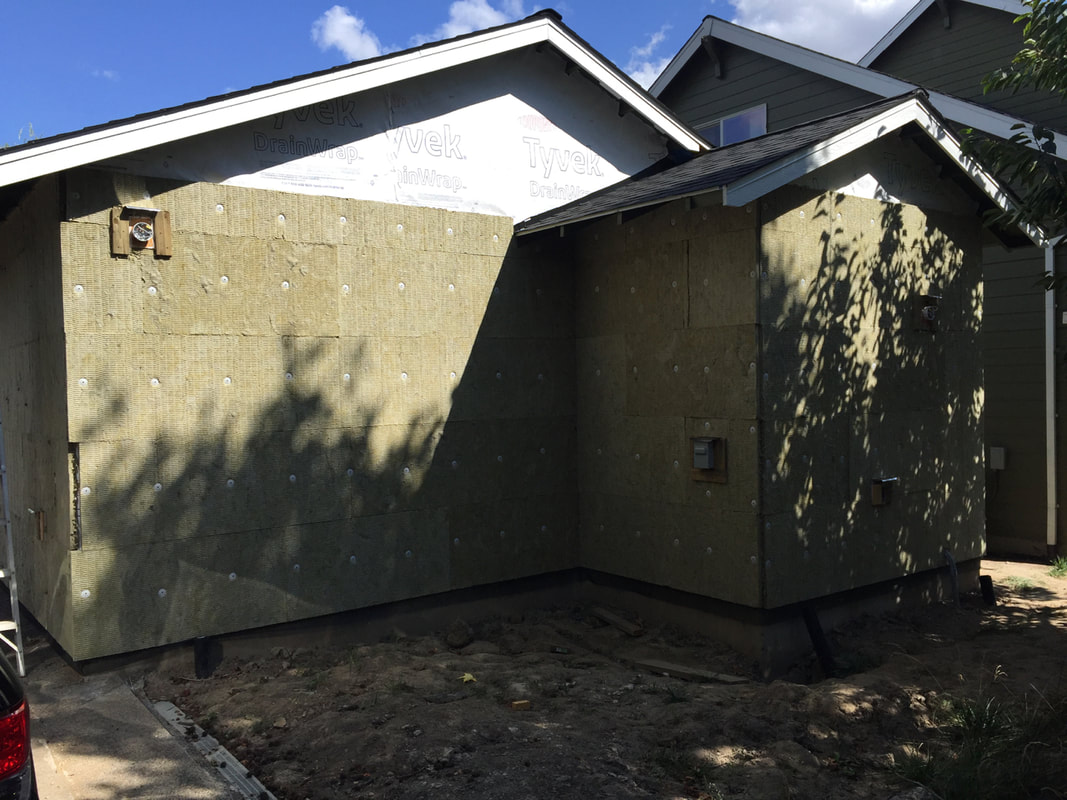
Once the door and window were in place, we started installing the exterior insulation. I decided to go this route because it allowed us to get the higher R value with 2x4 walls, it breaks the thermal bridging between the sheathing and studs, and it should also help keep noise in the shop down. We used rockwool which is better for sound deadening and is fireproof. Furring strips were added on top in order to install the siding onto it.
Next up was wrapping the shop which was a bit harder than thought. We had drain wrap which was flexible some so trying to mount straight was difficult. The garage door was going to install soon, so we had to get the trim and framing in. We also were able to install our first ever window and entry door. The window went well, but the door was an issue because the cement floor reduced the height. After hacking at the header enough to clear, the door was able to go in (hidden message, it was an absolute pain).
Once the door and window were in place, we started installing the exterior insulation. I decided to go this route because it allowed us to get the higher R value with 2x4 walls, it breaks the thermal bridging between the sheathing and studs, and it should also help keep noise in the shop down. We used rockwool which is better for sound deadening and is fireproof. Furring strips were added on top in order to install the siding onto it.

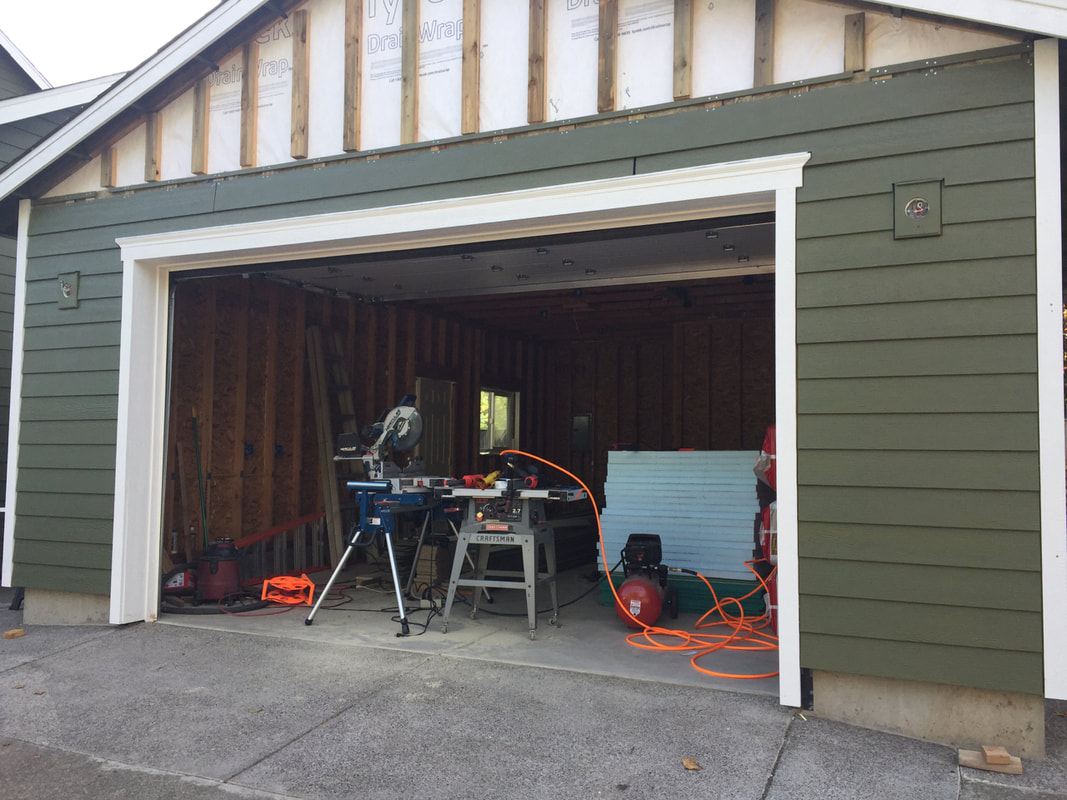
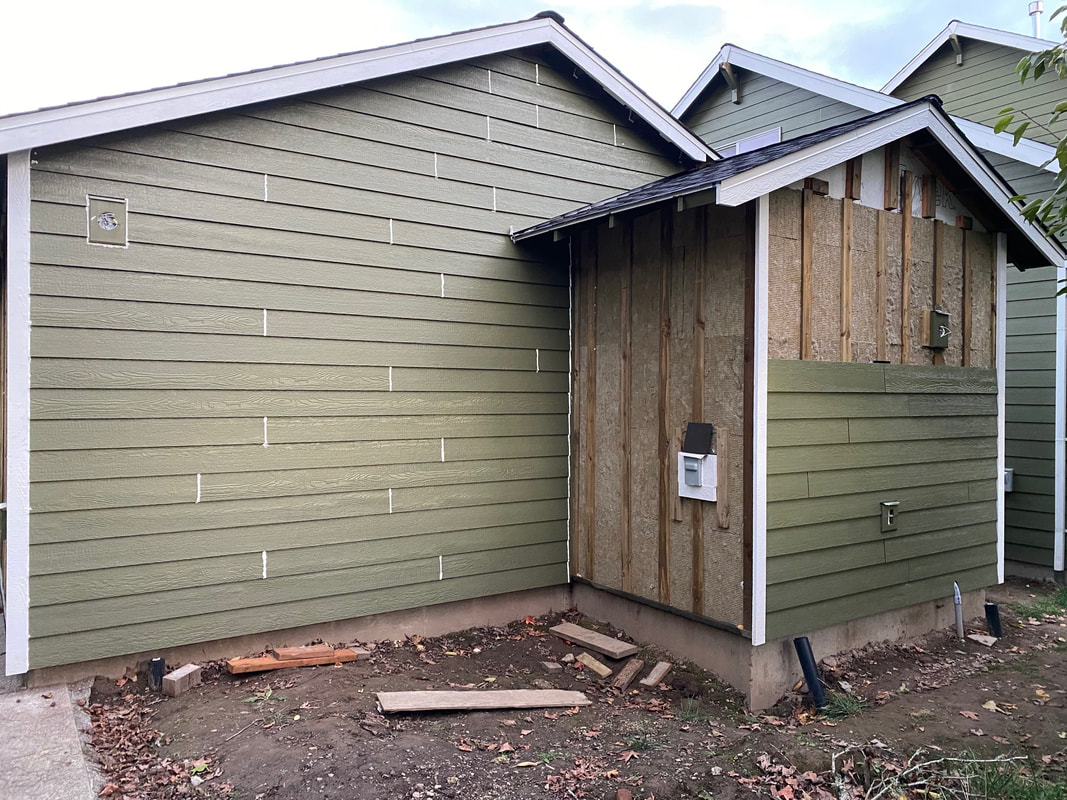
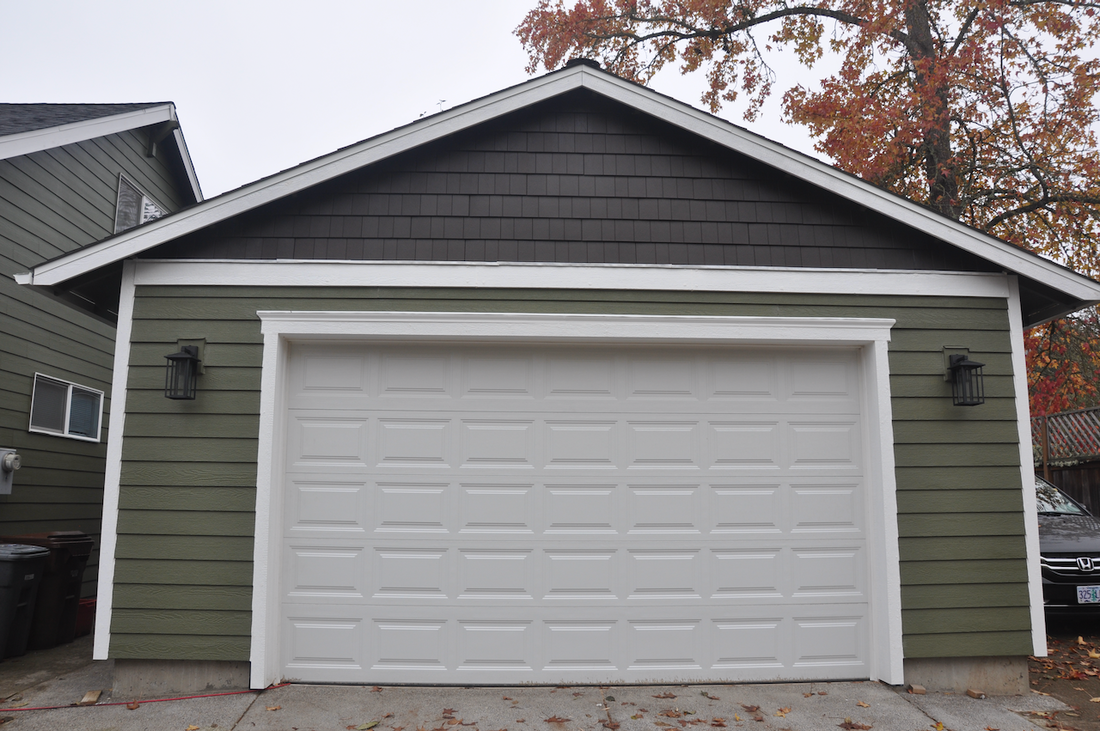
Next up was installing the exterior siding and interior insulation. I decided to use LP Smartside for the siding because it didn't require special tools and I didn't have to worry about hazardous cement dust. The life of the product is suppose to be the same when installed to their spec. We painted the front, back and edges of all pieces so they are completely encapsulated. As the siding goes on, the place starts to look like a real nice building! Using a tool called Solo Sider Pro made the installation of siding very easy by setting the proper overlap and allowing 1/16" adjustments to match height with an adjacent piece and to ensure things are level. With the front done, we can really see how this will look!
For the interior, rockwool was installed in the walls and the ceiling got a mix of rockwool, fiberglass, and the ceiling was finished off with styrofoam sheet which will get painted. This combination will allow the ceiling to reach R50 and is readily accessible and less messy.
For the interior, rockwool was installed in the walls and the ceiling got a mix of rockwool, fiberglass, and the ceiling was finished off with styrofoam sheet which will get painted. This combination will allow the ceiling to reach R50 and is readily accessible and less messy.
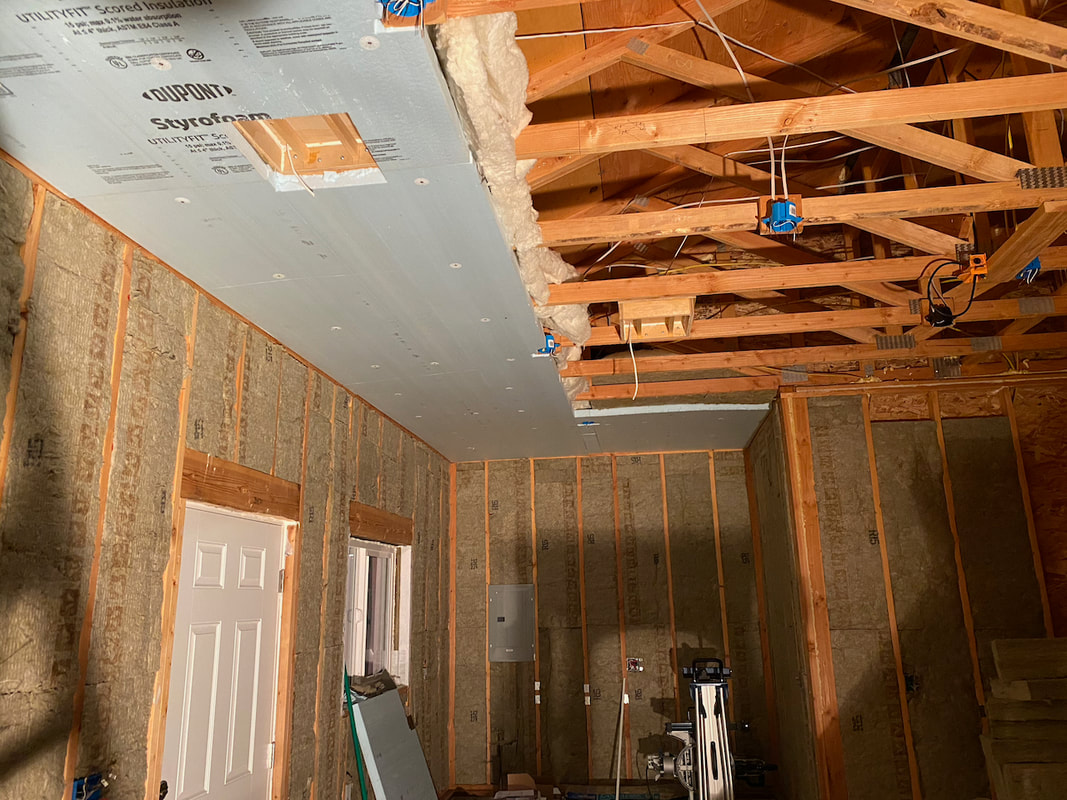
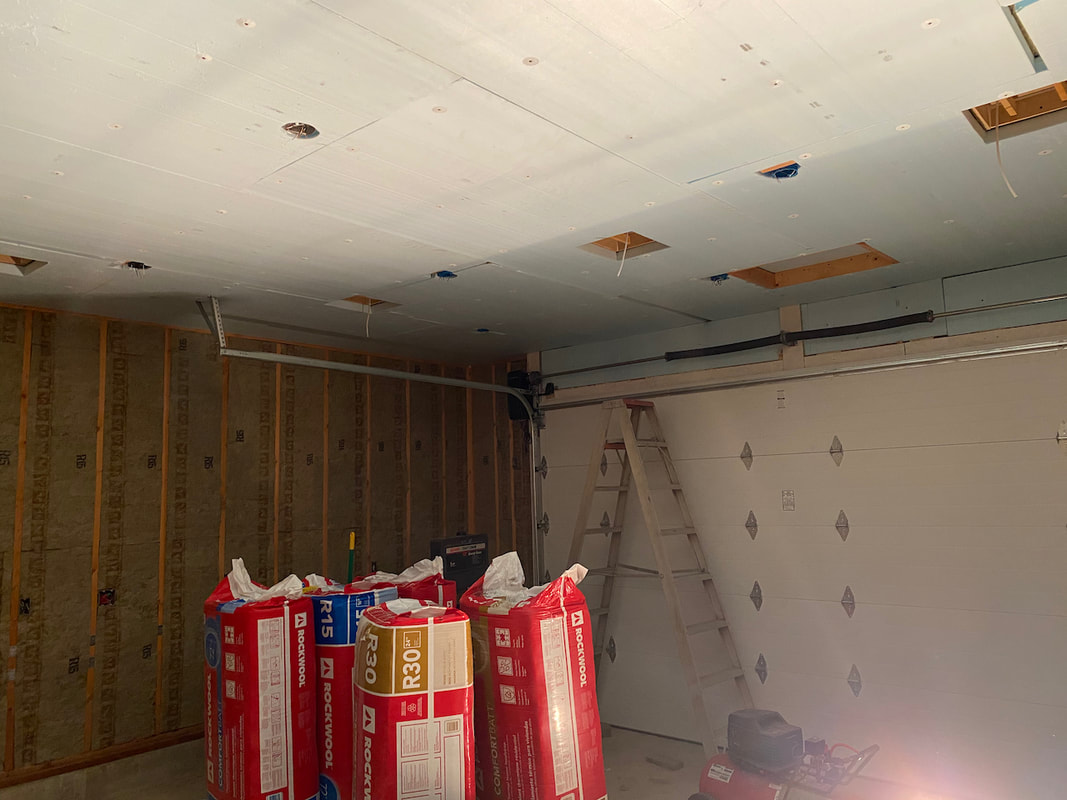
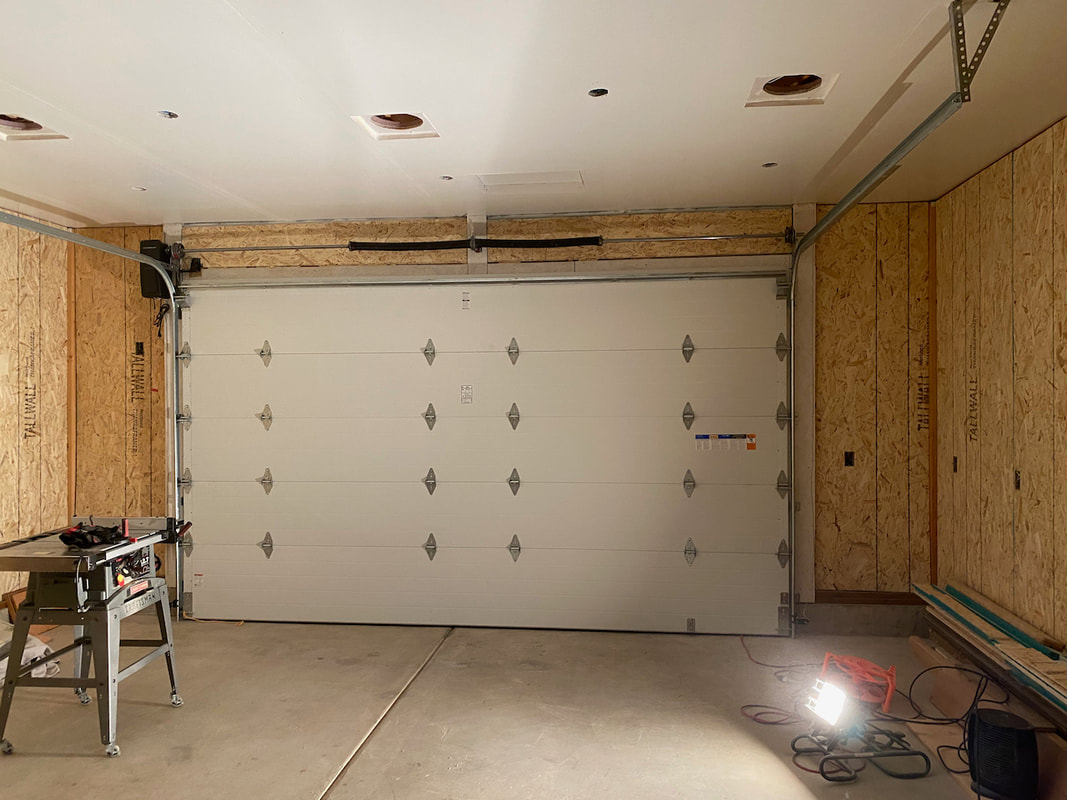
The inspector said that the ceiling has to be covered by drywall, so I decided to contract that out (I already did the ceiling once, didn't want to do it again). It will make my ceiling less accessible but hopefully I don't need to get in there again. I do have an attic entrance but the space is fairly small. I'm using OSB for the walls since it will allow me to screw things to it anywhere I want without wall anchors and should be more robust. The hardest part was cutting out all the outlets but that proved to not be too difficult. This was the point where I also trimmed out the door and window to make them look better. Once the OSB was in place and painted, it blended in nicely. It's starting to shape up! The end is near.

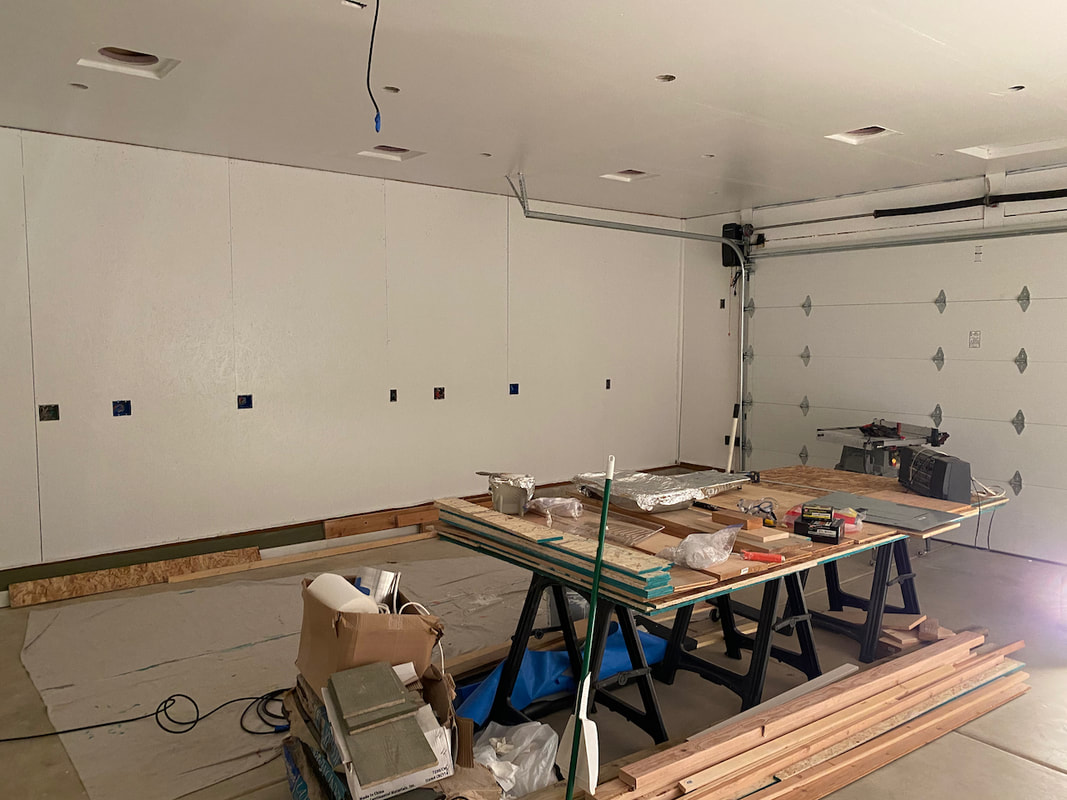
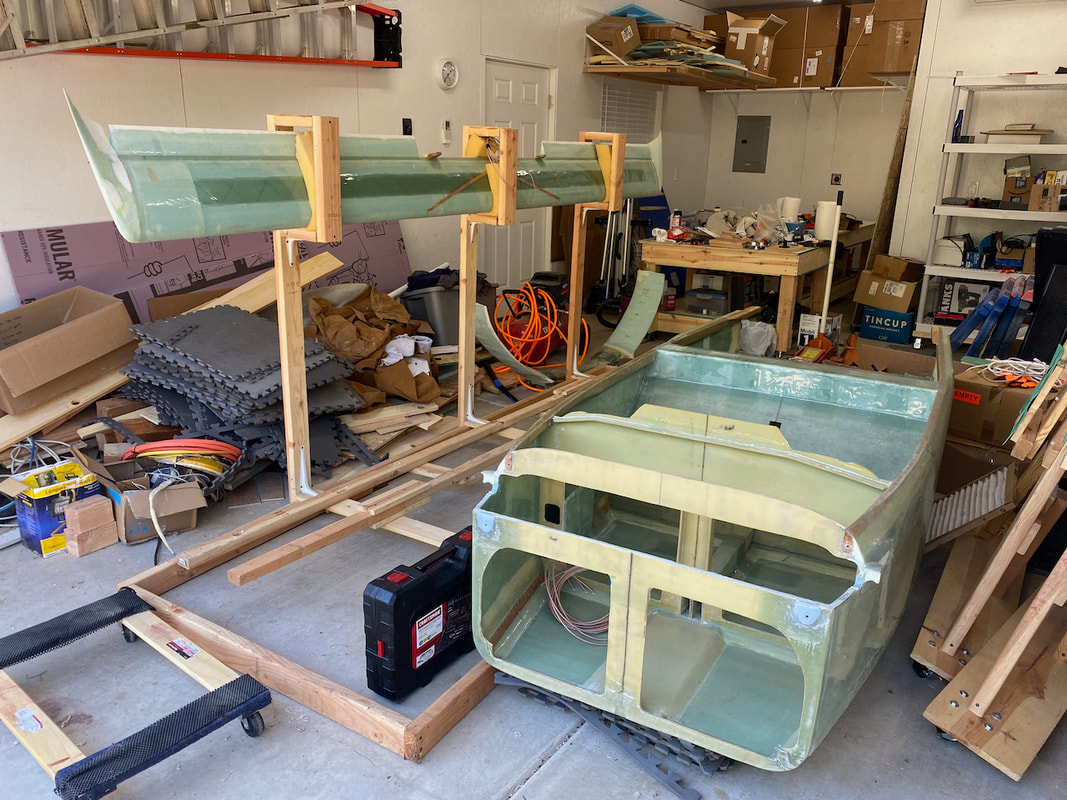
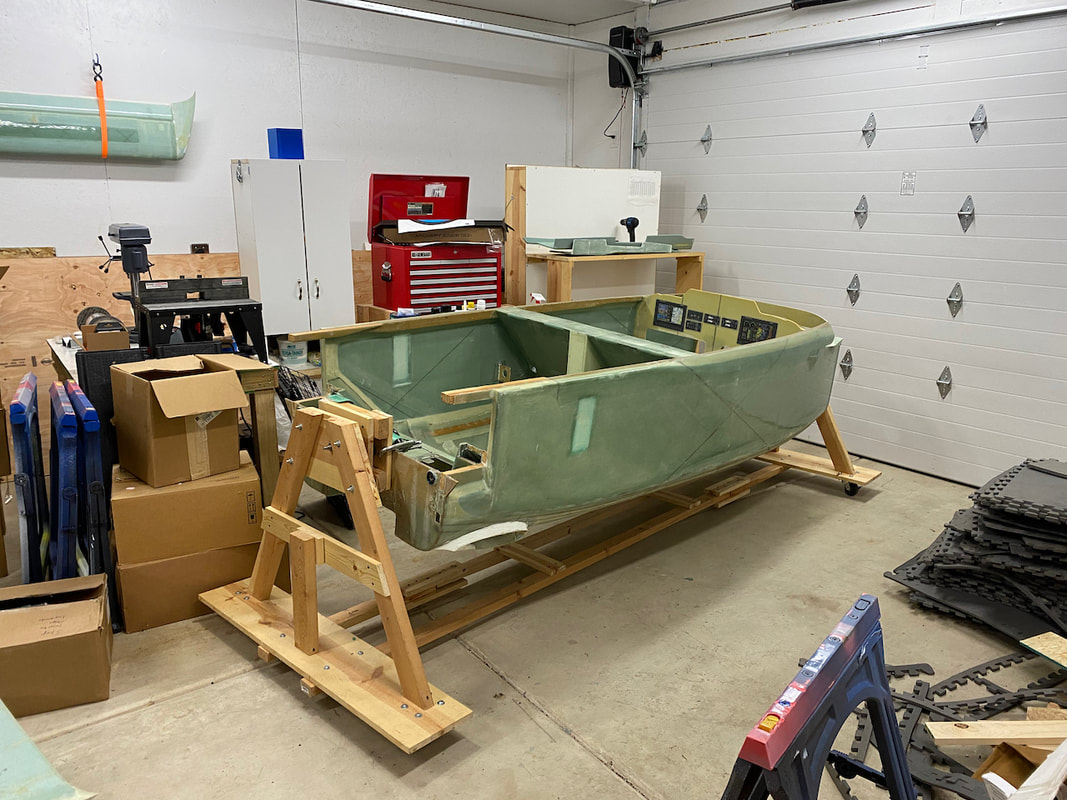
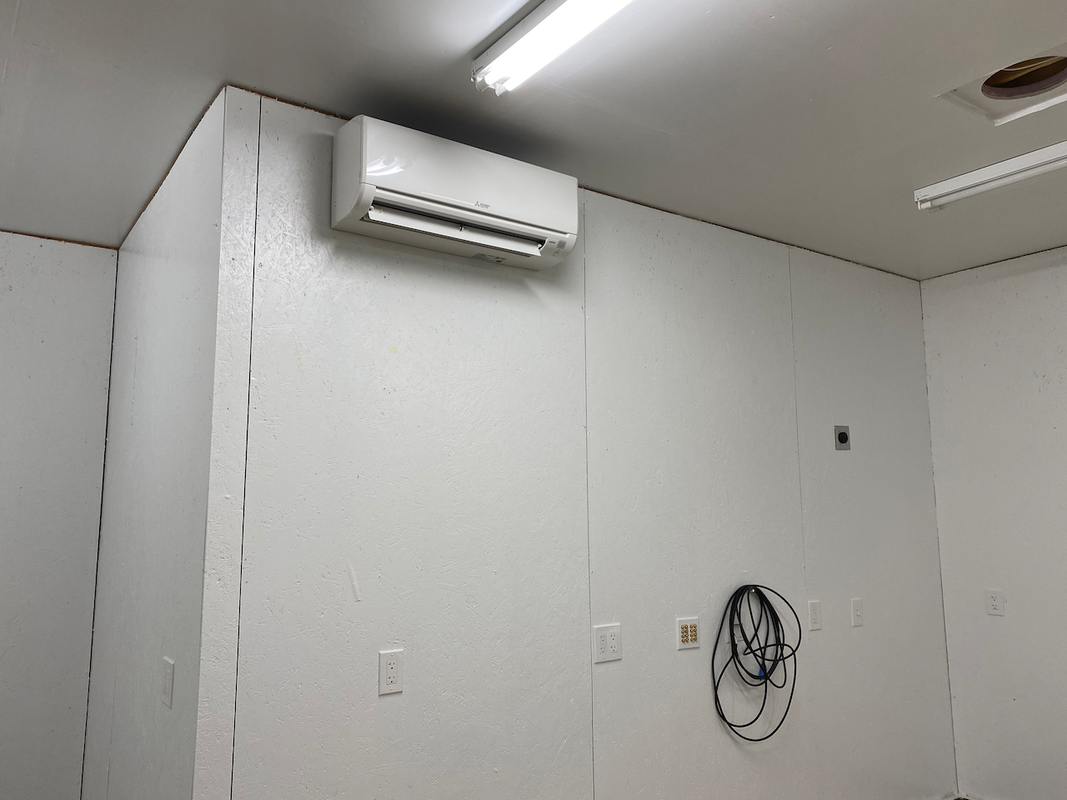
I neglected to make updates unfortunately, but the shop was finally finished structurally! All the permits were signed off and passed. We did get a mini split installed to keep the temperature moderated in the shop and it's working well. The insulation definitely keeps it quieter inside and also helps with the heating bill. All the lights were installed which I have on two circuits so I can only run half of them most of the time or all when doing detailed work like painting. The new build tables have been assembled. I made them 3 feet wide this time instead of 4. Consensus was I was already past most of the wide stuff, so gaining some room in the shop was welcomed. I did the 8 ft and 4 ft table combo that I can bolt together as needed. Worked well before. Shelves were made to put all the precut wing foam on and out of the way. Still have some items to take care of but it's soon for the plane to finally come home!


Just a quick update here. The shop is still a mess trying to figure out where to put everything. We are trying to make everything modular so the shop can be rearranged as needed for space. I also have a lot of things accumulated over the years that I must now figure out where to put. On top of that work has been crazy and not affording me a lot of free time. However, we did make one break through and finally brought Serenity home! I checked the log book and it's been 4 years and 8 months since my last entry. I found some peel ply that was still on it from my last layup, so I removed that and sanded down some micro. A new entry is officially in the log book and the project has officially restarted, though I'm still not going to make much progress for a bit.