Tools And Shop Setup
Before the build can commence, it's wise to get some tools that will assist in the build. Some can be picked up down the road, but others will be in use from the very beginning. Here's a list of the tools outside the standard epoxy tools that I have found very useful.
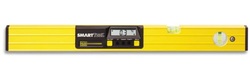
SmartTool Smart Level
This will be used for checking the level of many objects, including the work table. It will come in handy when you reach Chapter 6 when you have to start assembling items. It has an accuracy down to 0.1 degrees and will let you know which way you need to go to reach plumb. It also can store angles, so if you need to transfer an angle from one area to another, it will do this for you.
This will be used for checking the level of many objects, including the work table. It will come in handy when you reach Chapter 6 when you have to start assembling items. It has an accuracy down to 0.1 degrees and will let you know which way you need to go to reach plumb. It also can store angles, so if you need to transfer an angle from one area to another, it will do this for you.
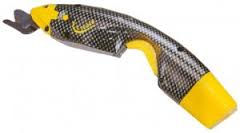
Electric Scissors (Dritz or equivalent)
These will make your glass cutting and trimming so much easier. They cut right through glass helping to make pieces as consistent as possible. They are also very useful for trimming off excess during a layup. Can cut through when the glass is still wet (just make sure to clean it off promptly). I wrapped mine up in plastic wrap to keep it clean. When the plastic wrap gets dirty, remove and replace.
These will make your glass cutting and trimming so much easier. They cut right through glass helping to make pieces as consistent as possible. They are also very useful for trimming off excess during a layup. Can cut through when the glass is still wet (just make sure to clean it off promptly). I wrapped mine up in plastic wrap to keep it clean. When the plastic wrap gets dirty, remove and replace.
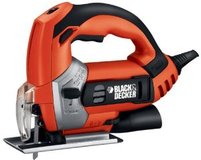
Jig Saw
There will be several cuts that have to be made along the way where one of these comes in very handy. These can be used for cutting out parts, contouring edges, cutting angles, etc... A scroll bade will work well when cutting out objects with curves such as the firewall. You can do most band saw type cutting with this, though a band saw tends to leave a better cut since the blade moves in one direction only and at a constant rate. Still, it's a good tool to have around when you can't use a band saw.
There will be several cuts that have to be made along the way where one of these comes in very handy. These can be used for cutting out parts, contouring edges, cutting angles, etc... A scroll bade will work well when cutting out objects with curves such as the firewall. You can do most band saw type cutting with this, though a band saw tends to leave a better cut since the blade moves in one direction only and at a constant rate. Still, it's a good tool to have around when you can't use a band saw.
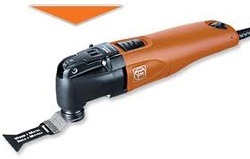
Variable Oscillating/Multi Purpose/Fein Tool
Goes by several names, though Fein was the first to come out with it. This tool works by allowing several types of blades to attach, then vibrates them back and forth about 2º real fast to make a cutting action. This tool will be used frequently as it's fabulous for trimming excess glass off after cure instead of waiting for knife trim conditions and allows for a nice precise cut. It also leaves a cut gap that's very thin. There are sanding attachments that can help to make short work of sanding. Definitely get one of these.
Goes by several names, though Fein was the first to come out with it. This tool works by allowing several types of blades to attach, then vibrates them back and forth about 2º real fast to make a cutting action. This tool will be used frequently as it's fabulous for trimming excess glass off after cure instead of waiting for knife trim conditions and allows for a nice precise cut. It also leaves a cut gap that's very thin. There are sanding attachments that can help to make short work of sanding. Definitely get one of these.
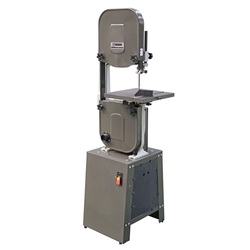
Band Saw
This is a great tool to have around for multiple uses. I found it very useful when trimming bulkheads and especially cutting the 1/4" hard point. It will be useful if you also plan to cut your own metal parts out. The cut is very clean and easy to control with the flat surface. If you can manage to get one, it will be highly worth having.
This is a great tool to have around for multiple uses. I found it very useful when trimming bulkheads and especially cutting the 1/4" hard point. It will be useful if you also plan to cut your own metal parts out. The cut is very clean and easy to control with the flat surface. If you can manage to get one, it will be highly worth having.
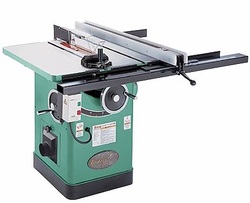
Table Saw
Just a good standard table saw can come in handy. I used it for cutting the wood pieces as well as cutting foam when angled edges were needed. The table saw has a larger flat surface than a band saw and typically has items to assist in straight cutting. It also didn't hurt that I already had one.
Just a good standard table saw can come in handy. I used it for cutting the wood pieces as well as cutting foam when angled edges were needed. The table saw has a larger flat surface than a band saw and typically has items to assist in straight cutting. It also didn't hurt that I already had one.
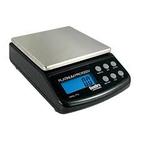
Electronic Scale
There appears to be a divide in the fiberglass community on whether to use an epoxy pump or a scale. The epoxy pump people will tell you that it's very quick (and indeed it is). The scale people will tell you that you retain your accuracy and the time spent isn't much more than the pump. I went with the MGS epoxy system which has a fast and slow hardner that can be mixed proportionally to get different cure times. Gives a lot of flexibility, which is great. Use more fast, which is cheaper to get, when you have smaller jobs then add more slow when you have bigger layups. An epoxy pump pretty much locks you to one ratio. The other thing that I just didn't like was not knowing if a problem developed. If a line gets partly clogged, there's not much to tell you that it went wrong. Epoxy systems are picky about their ratios, so it's important to have the correct ratios. A weight check at the beginning of the job will help check for something, which means if you have an epoxy pump you still need a balance. I decided I'd rather take the time to measure out my batches knowing that I don't have to worry about a bad batch of epoxy from an incorrect ratio. The time used doing this is not much more and in the long run will save time by not having to redo a part if the epoxy is bad. Plenty of people use the pumps with great success, so don't think I'm striking them down. They just won't work for my situation with the different ratios I can use and because I'd rather know without any question what I've mixed up. Make sure to wrap the scale in plastic wrap to keep clean, but not too tight that it affects measurements. I taped a piece of mylar to the top and covered the key pad in plastic wrap.
There appears to be a divide in the fiberglass community on whether to use an epoxy pump or a scale. The epoxy pump people will tell you that it's very quick (and indeed it is). The scale people will tell you that you retain your accuracy and the time spent isn't much more than the pump. I went with the MGS epoxy system which has a fast and slow hardner that can be mixed proportionally to get different cure times. Gives a lot of flexibility, which is great. Use more fast, which is cheaper to get, when you have smaller jobs then add more slow when you have bigger layups. An epoxy pump pretty much locks you to one ratio. The other thing that I just didn't like was not knowing if a problem developed. If a line gets partly clogged, there's not much to tell you that it went wrong. Epoxy systems are picky about their ratios, so it's important to have the correct ratios. A weight check at the beginning of the job will help check for something, which means if you have an epoxy pump you still need a balance. I decided I'd rather take the time to measure out my batches knowing that I don't have to worry about a bad batch of epoxy from an incorrect ratio. The time used doing this is not much more and in the long run will save time by not having to redo a part if the epoxy is bad. Plenty of people use the pumps with great success, so don't think I'm striking them down. They just won't work for my situation with the different ratios I can use and because I'd rather know without any question what I've mixed up. Make sure to wrap the scale in plastic wrap to keep clean, but not too tight that it affects measurements. I taped a piece of mylar to the top and covered the key pad in plastic wrap.
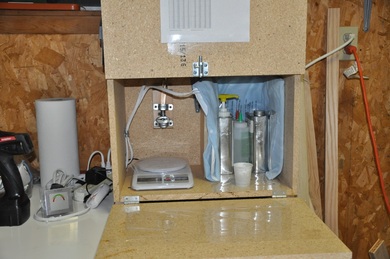
Epoxy Heat Storage Box
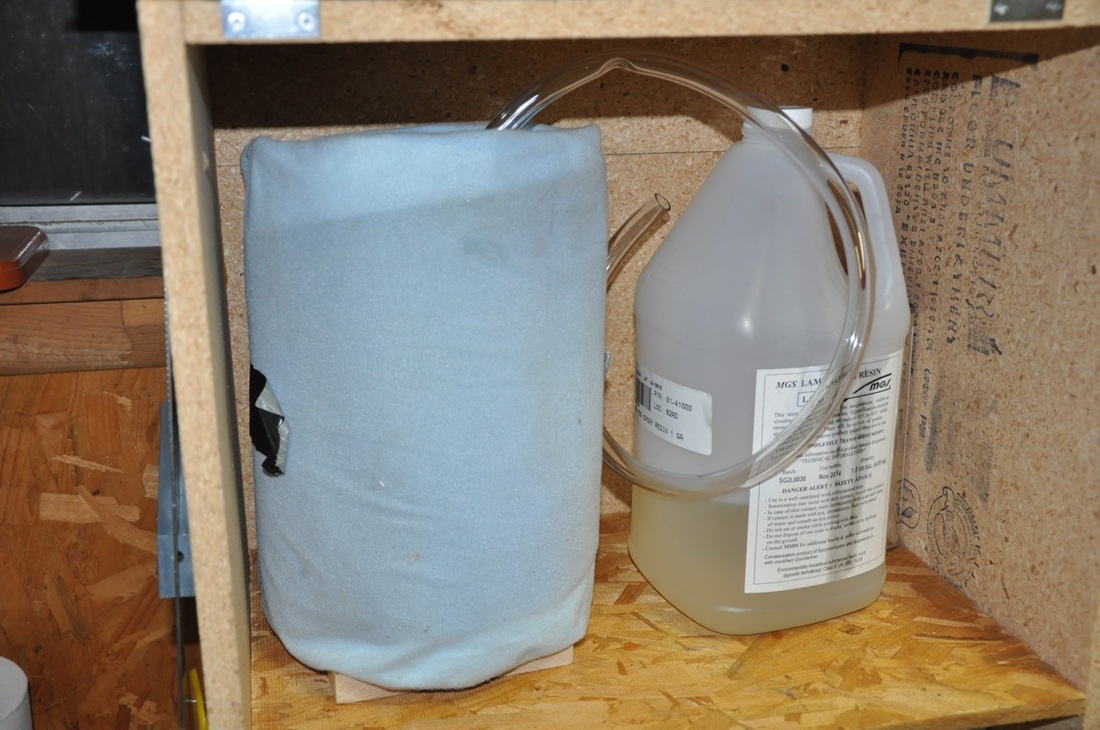
This is something that will have to be constructed whether you go with a pump or a scale. Epoxy flows much better at higher temps because it's less viscous (thickness of the fluid). An epoxy box allows the resin and hardner to remain at elevated temperatures while waiting to be used. There are several methods for going about making one, and there's no right or wrong method. For mine, I followed Jerry Schneider and used one of the metal containers that my hardener was shipped in to store my resin (Free container!). An outlet was attached to the bottom by sanding the metal of the can around the hole that was drilled for the 90 degree angle hose barb and then generously floxed in place. An air inlet added to the lid. I can close off the inlet to limit the amount of air that gets into the resin (too much air exposure can change the resin). The container is wrapped with a heating pad to warm the resin. I liked this idea because you're only using the electricity to heat unlike a light bulb that is wasting some to light and I'm not causing any light degradation. It also holds the heat close to the object that needs heating rather than heating the air overall. It should be more efficient. I added a valve directly over the scale to dispense directly into a cup. The hardeners are kept in their original container and just poured directly into the cup and are stored in a holder surrounded by a heating pad to keep them warm. I tried pumps on the bottles but found that they would crystallize too easily causing other problems. This seems to work better but does take a bit of control with the hand to pour the right amount though not as bad as I originally thought. The box is capable of moving around as needed
This is something that will have to be constructed whether you go with a pump or a scale. Epoxy flows much better at higher temps because it's less viscous (thickness of the fluid). An epoxy box allows the resin and hardner to remain at elevated temperatures while waiting to be used. There are several methods for going about making one, and there's no right or wrong method. For mine, I followed Jerry Schneider and used one of the metal containers that my hardener was shipped in to store my resin (Free container!). An outlet was attached to the bottom by sanding the metal of the can around the hole that was drilled for the 90 degree angle hose barb and then generously floxed in place. An air inlet added to the lid. I can close off the inlet to limit the amount of air that gets into the resin (too much air exposure can change the resin). The container is wrapped with a heating pad to warm the resin. I liked this idea because you're only using the electricity to heat unlike a light bulb that is wasting some to light and I'm not causing any light degradation. It also holds the heat close to the object that needs heating rather than heating the air overall. It should be more efficient. I added a valve directly over the scale to dispense directly into a cup. The hardeners are kept in their original container and just poured directly into the cup and are stored in a holder surrounded by a heating pad to keep them warm. I tried pumps on the bottles but found that they would crystallize too easily causing other problems. This seems to work better but does take a bit of control with the hand to pour the right amount though not as bad as I originally thought. The box is capable of moving around as needed


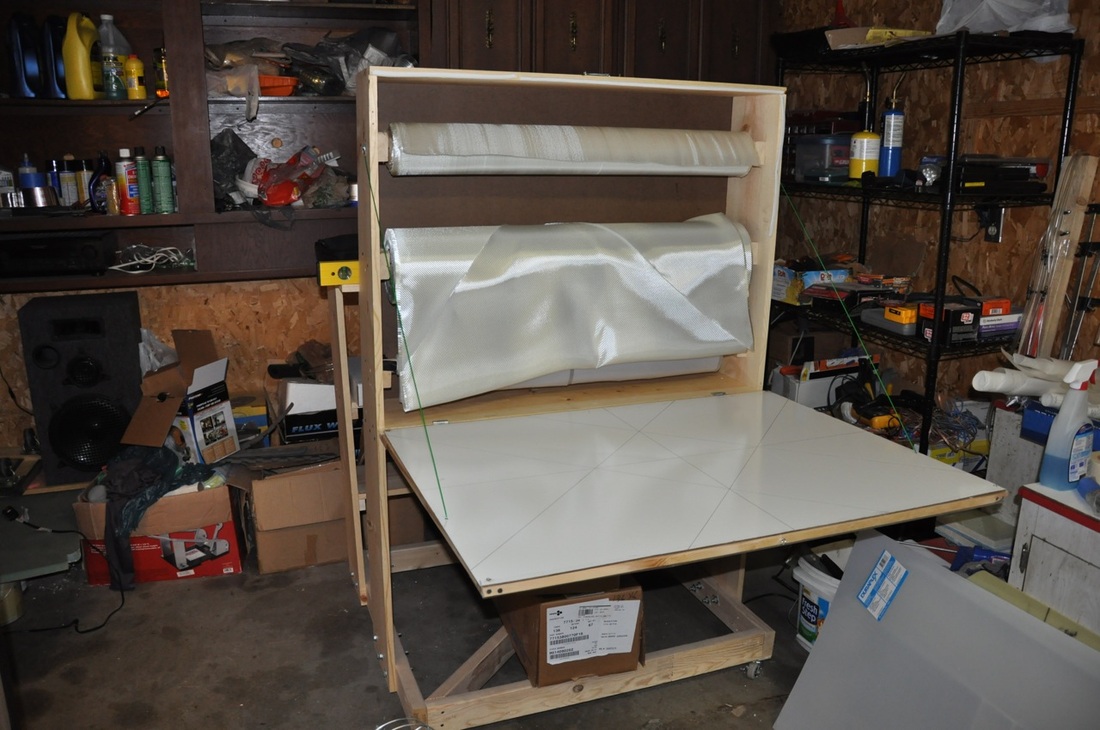
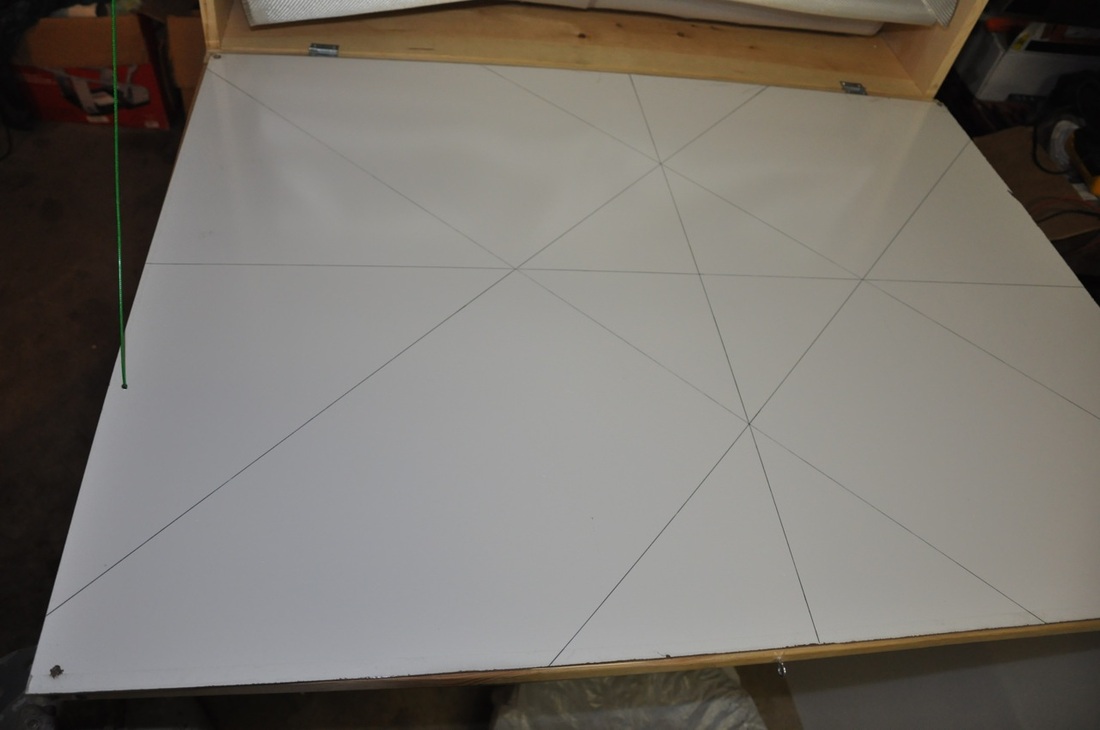
Fiberglass Storage And Cutting Area
This is also handy to have and will vary in design based on how much room you have. It's a good idea to keep your glass clean and easy to pull off the roll. You can get closet hanger supports at home stores for large dowels to hold up the rolls (I made my own from scrap wood). The box has a close-able lid that also acts as a cutting board. I used dry erase board (you can get a 4 ft x 8 ft sheet for about $15) and drew cutting lines on the surface (straight and 45 degree angles). I also used it on the back of the box and can use markers to draw out notes or sketches. The box is also mounted to a castering base that allows me to move it around the shop. This gives a lot of placement freedom and it can even be used to dispense fabric right onto a layup. There's also a shelf for setting the plans on to review and shelves for holding tools and supplies. Other than needing larger wheels, this has worked out well.
This is also handy to have and will vary in design based on how much room you have. It's a good idea to keep your glass clean and easy to pull off the roll. You can get closet hanger supports at home stores for large dowels to hold up the rolls (I made my own from scrap wood). The box has a close-able lid that also acts as a cutting board. I used dry erase board (you can get a 4 ft x 8 ft sheet for about $15) and drew cutting lines on the surface (straight and 45 degree angles). I also used it on the back of the box and can use markers to draw out notes or sketches. The box is also mounted to a castering base that allows me to move it around the shop. This gives a lot of placement freedom and it can even be used to dispense fabric right onto a layup. There's also a shelf for setting the plans on to review and shelves for holding tools and supplies. Other than needing larger wheels, this has worked out well.

Temperature Controlled Assembly Room (Or my Heat Booth)
If you don't have a well insulated workshop or you don't live somewhere that stays 70-80 all day, then you will likely need to control temps somehow. Since I live in high desert, I get very cold temps in the winter and hot temps in the summer (Fall and Spring don't really exist). What I ended up doing was building a self contained work room with insulated walls and ceilings plus foam padding on the floor to help insulate and make it easier to stand on. The initial room is 10 x 14 feet with a 7 foot ceiling. I have fiberglass insulation on the ceiling and foam board on the walls. I'm able to heat to 90 degrees or more with a standard room heater (120V 1500W). The room was made relatively cheap. As such, I do plan to make an improved version with 2 extra feet of width (12 x 14) and do actual studded walls with fiberglass insulation. This should work even better for heat retention while giving a bit more room. Any bigger and I won't be able to use the rest of the shop well. This size should allow most of the fuselage work to take place. If you live somewhere that fluctuates a lot in temp outside the working range, seriously consider your options for controlling temperature.
If you don't have a well insulated workshop or you don't live somewhere that stays 70-80 all day, then you will likely need to control temps somehow. Since I live in high desert, I get very cold temps in the winter and hot temps in the summer (Fall and Spring don't really exist). What I ended up doing was building a self contained work room with insulated walls and ceilings plus foam padding on the floor to help insulate and make it easier to stand on. The initial room is 10 x 14 feet with a 7 foot ceiling. I have fiberglass insulation on the ceiling and foam board on the walls. I'm able to heat to 90 degrees or more with a standard room heater (120V 1500W). The room was made relatively cheap. As such, I do plan to make an improved version with 2 extra feet of width (12 x 14) and do actual studded walls with fiberglass insulation. This should work even better for heat retention while giving a bit more room. Any bigger and I won't be able to use the rest of the shop well. This size should allow most of the fuselage work to take place. If you live somewhere that fluctuates a lot in temp outside the working range, seriously consider your options for controlling temperature.
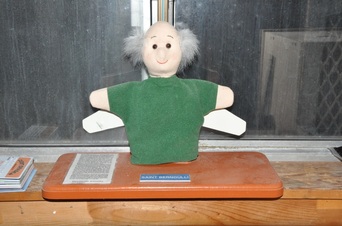
The Building Mascot
Years ago during my hang gliding time, a friend of mine made me Saint Bernoulli with his hang glider wing and sky blue halo. A copy of Bernoulli's principle is also on the base. He has become the building mascot and now watches over the construction process to bless it's progress towards first flight.
Years ago during my hang gliding time, a friend of mine made me Saint Bernoulli with his hang glider wing and sky blue halo. A copy of Bernoulli's principle is also on the base. He has become the building mascot and now watches over the construction process to bless it's progress towards first flight.
A Note On Buying Tools
When it comes to big projects, the better the tools the better your quality time on the project tends to be. Nat had rather basic hand tools compared to what's available now, especially the fein tool. It is generally accepted that you want to buy the best tools you can. However, the nice thing about this project is that it doesn't require a large amount special tools. Most of them tend to be of the wood working type. If I had to recommend one special tool, it would be the fein-type tool. This will do so much for you for so many things in the project.
As for tool quality, again if you can afford the best, then do so. However, if buying something from Harbor Freight will get you a tool that you wouldn't have been able to have otherwise, then it will still put you ahead, but it might not be as refined. With that said, I bought a $20 cordless drill and a $30 fein-type tool from Harbor Freight and they have worked great. The actual Fein tool may be better balanced, but for $30 I've been able to do a lot. When it comes down to it, it's not so much what tools you have, but how you use them. Another great option is to find used tools. sometimes you can locate some great tools for lower prices by buying used. I got a decent shop vac cheap. It required a bit of cleaning out, but once I did it ran wonderfully. So get what you can and start building.
