Fiberglass Defects Reference
Though the plans go into details about different defects, it really helps to have some images to reference what they're talking about. I know I would have appreciated it. So as a service to others, I'm supplying defect examples (unfortunately most happened during the build) to use for better reference during a build. Don't worry when they happen. This is a learning experience after all. It happens to everyone. Not repairing them would be a greater mistake than getting mad that they happened and repairing them.
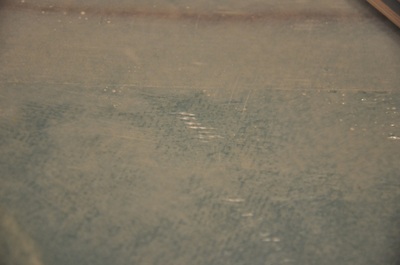
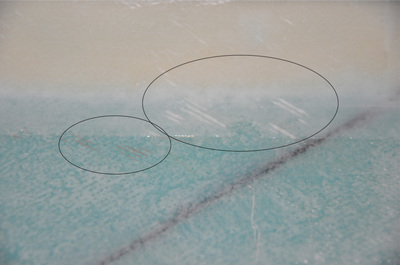
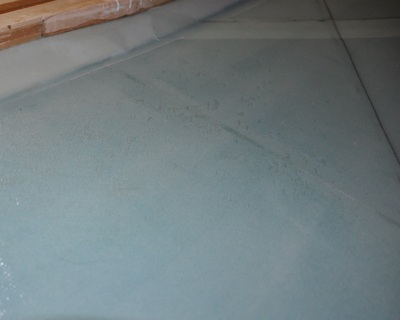
Dry spots
Description: Improper full wet-out of the glass fibers during a layup. Will appear as white-silvery strands within the resin and will remain visible at multiple angles (you can sometimes see glass reflect off the light under a smooth plastic peel ply surface, but they disappear at different angles).
Causes: Resin too thick/cold, contaminated area, too much air in the resin, improper surface preparation, resin hardened around fibers before wetting out, squeegeed to hard.
How to avoid: Spread resin out as soon as possible after mixing the hardner in, maintain a working environment temperature of 70-80 degrees F, keep the resin warm before use, use a hair dryer to thin out a troublesome area, wear clean gloves when handling glass fiber, stipple the area well, wet out the bottom layer before applying the fabric in order to soak up from below, avoid contaminating the glass or getting wafer on it, do not over squeege the surface.
Repairs: If in a 6 inch x 6 inch area the dry spots are less than 10% the plans say this is acceptable. More than this then the area will need to be cut out and replaced with the same type and number of layers of cloth. The affected area should have the glass sanded back 1 inch for every layer outside the affected area to transition the repair to the good glass. Cover the repaired area with 1 ply BID (these instructions are covered in more detail in the plans).
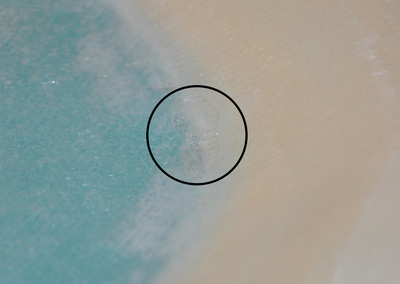
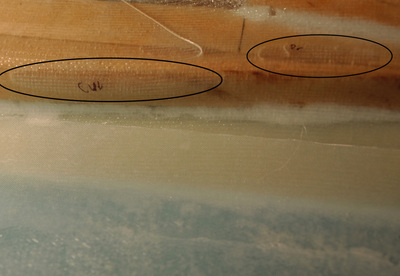
Delaminations/Voids
Description: A bubble or void under the glass or between glass layers from either trapped air or separating from adjacent layers. Will appear as an air bubble underneath the layup. Light from a hand held lamp will often reflect at the edges. Details of the bottom surface under the area will appear blurry from the normally transparent appearance of the fiberglass.
Causes: Lack of removing air from the layup, improper surface preparation, fabric improperly trimmed away at edge during cure, fabric stressed in one direction causing it to wrinkle, not applying enough curve to edges where glass wraps around.
How to avoid: Ensure that all air has been removed from the layup as much as possible, make sure that the surface was properly prepared (micro on foam, a layer of epoxy on wood, fully sanded cured fiberglass and a layer of epoxy for bonding to cured fiberglass), glass hanging off the edge of a piece should be trimmed to 0.25 inches to avoid pulling on it, make sure the glass is evenly spread out and not pulling tightly one one area and hanging loose in another. Plastic peel ply can help here too. Note that for foam prep, some have found that the blue PVC foam seems susceptible to creating many void by having the micro too thin, so when spread out, don't try to scrape it down to the bare minimum. Leave a little extra. It'll get soaked up by the glass anyway. Allowing a layup to cure at layup temp (70-80 degrees F) to a hard shell stage and then increasing temp to final cure will help in avoiding expansion while the glass is still wet. Make sure any corners have been rounded over to allow easier transitioning.
Repairs: Void or bubbles less than 2 inches in diameter can be fixed by drilling two small holes at the very ends of the bubble (preferably one at the highest point) and injected with epoxy to fill it up. One hole is used for inserting a needle, the other allows the air out. For larger holes, the affected area is cut out and repaired as directed in the plans (similar to the dry area repair).
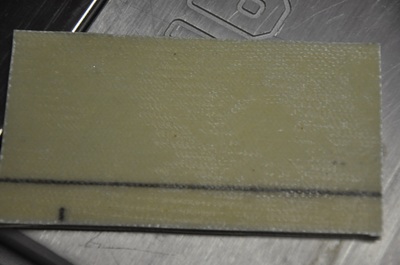
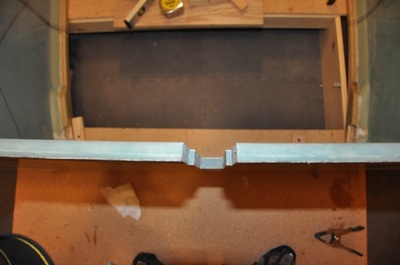
Warped Parts
Description: Parts that have changed shape either twisting, sagging, or other methods of movement.
Causes: Too high of temperature causing the epoxy to soften, internal stresses, stress present when parts were assembled
How to avoid: Ensure parts never exceed their max temp, ensure parts are flat at point of manufacturing and are held flat during cure, Ensure during part assembly there isn't pressure causing a force in one part.
Repairs: For flat pieces, heating to 140-150 F and then pressing between two flat objects will help to flatten out the area. For complex shapes, localized heating can be used along with some type of form to help hold it in shape. Others may require a complete rebuild depending on the part and the issue.
