Lightsabers!!
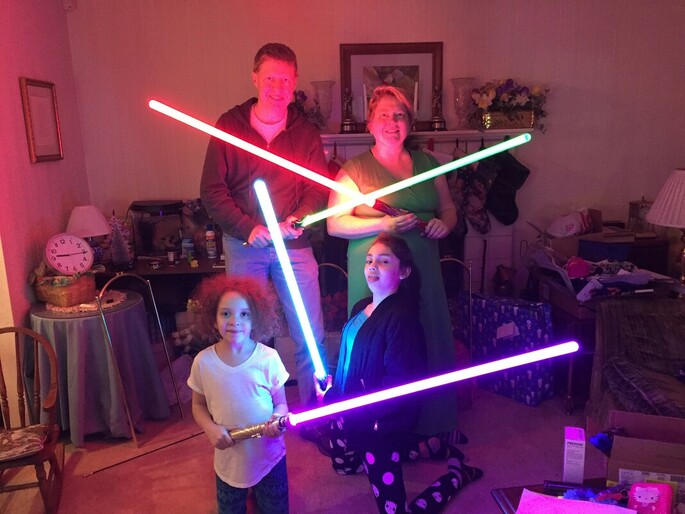
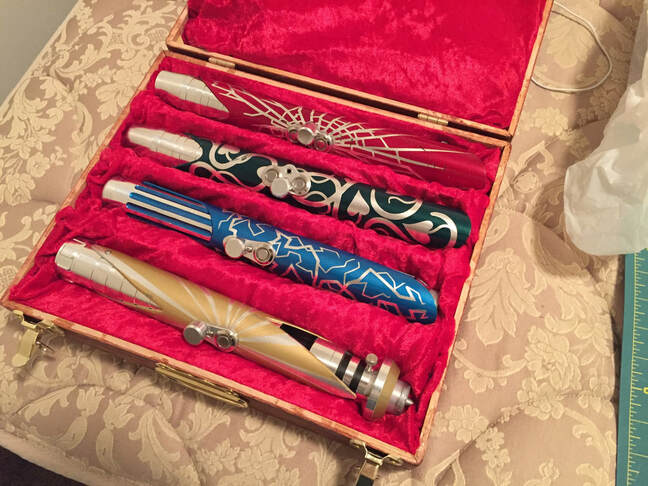
Okay, this one is a bit of a stretch to call an aviation project, but there are spaceships in the Star Wars movies and I might paint one of them on the bottom of Serenity (not determined yet, though it may be Serenity if my wife gets her way). During the time that I was living apart from the family when I couldn't transfer my job after they moved, I used it to build lightsabers for each person. it was meant to be both a gift and a "sorry I have been gone for so long" present. Unlike the toys in the stores, these are made of metal hilts, have a fairly bright blade, and will react to swinging and clashing. They are about as close as you get to the real thing without trying to figure out how to contain or not be burned by plasma. So I thought I would share them.
Most of this project came from a place called The Custom Saber Shop. The supply parts that can be mixed and matched by screwing together to create the look you are after. They also sell the internals that power the LEDs and provide the sound. Note that this is not a cheap project, but they are also not cheap items. They have a nice weight to them, they are better looking than most cheaper sabers you see in stores, and they can be used for dueling (some can handle hard dueling!). There are videos for the shop that go over construction as well as a forum that is very helpful. There is even an online saber builder that will allow you to see how most parts fit together and what overall look and length comes out at.
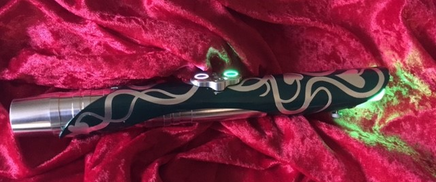
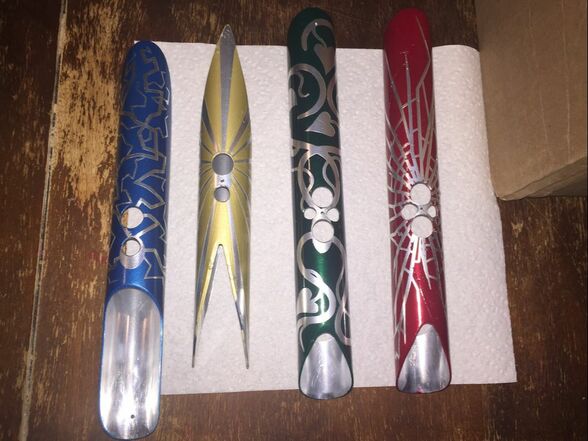
Although my relative construction was similar for each saber, I used different parts to give each one a different look. I also made custom shrouds to really set them apart and give them more character rather than just a metal tube. The shop provides tubing that fits perfectly over the saber parts. For my sabers, each one was given a name and are the following in order for the picture below:
The Enforcer, the Illuminator, Creation, and Destruction.
To make the shrouds, I cut out the profiles according to my templates. I then drilled the holes for the buttons and attachment screws. The parts were then covered with a vinyl template, primed, painted, then baked to harden the paint on. The vinyl was removed and the whole shroud was clear coated and baked for extra protection. This worked out fairly well as the paint is rather hard and gives the parts some small amount of texture and added color.
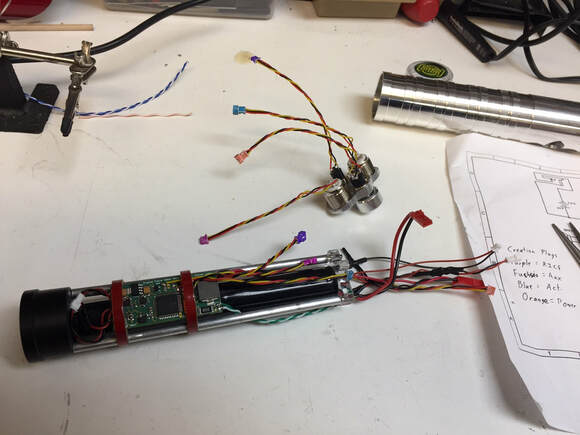
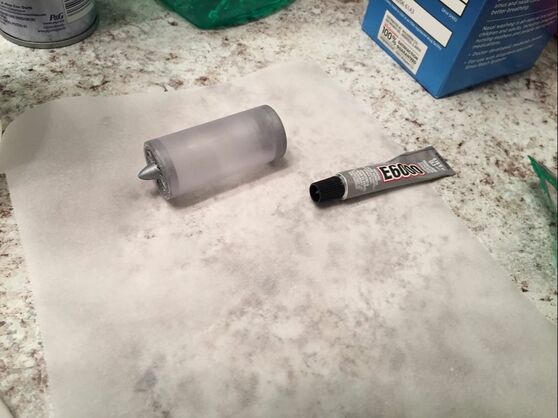
The next step was to assemble the internals which took some doing. There's a lot of wires to fit into a tiny space. I used some micro JST plugs in order to make assembly and disassembly easier plus the wires were small enough to help with the fit. I used two sound cards: the nano Biscotti and the Crystal Focus both from Plecter Labs. These are generally regarded as some of the best sound cards on the market. I'm fairly happy with the options and response that are available with these cards. The chassis consists of the battery, a Li-Ion pack, the sound card, and a speaker plus all associated wiring. Laser cut disks take care of the job of holding everything in place along with some metal tubing and threaded rod. This then slides into the saber body. Also pictured is the activation switch box that in this case has both the charge port and the programming port added.
The next step was to assemble the internals which took some doing. There's a lot of wires to fit into a tiny space. I used some micro JST plugs in order to make assembly and disassembly easier plus the wires were small enough to help with the fit. I used two sound cards: the nano Biscotti and the Crystal Focus both from Plecter Labs. These are generally regarded as some of the best sound cards on the market. I'm fairly happy with the options and response that are available with these cards. The chassis consists of the battery, a Li-Ion pack, the sound card, and a speaker plus all associated wiring. Laser cut disks take care of the job of holding everything in place along with some metal tubing and threaded rod. This then slides into the saber body. Also pictured is the activation switch box that in this case has both the charge port and the programming port added.
To finish off the build, I made a box to hold everything in. The box was made in haste and is not perfect by any means, but it functions. I laser etched the surface to allow for an epoxy resin inlay which I used glitter to mix in. I wanted to use pearl mica but couldn't find a source on short notice. The glitter still worked out but pearl mica would have had a more solid metallic appearance. It was my first time doing an inlay and I think it turned out just fine. The inside was covered with batting and red crushed velvet to give it a more elegant feel. Again, it was made in haste so it's definitely not a professional looking job, but it does keep the sabers nice and protected and gives it that extra pop for presentation.

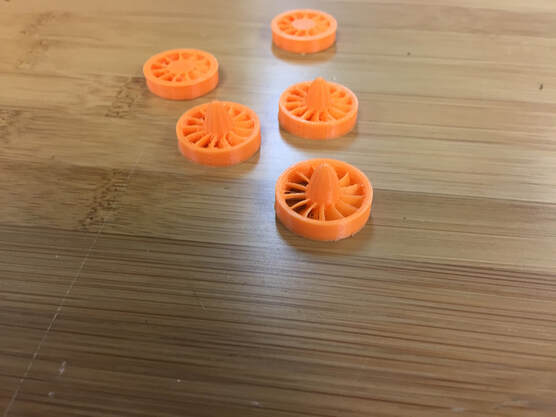
I also made the blades by using the typical polycarbonate tubes but sanding the inside to help diffuse. I then added clear cellophane gift wrap to the inside along with a film that they call "blade film" which has a horizontal fringe pattern on it. This is suppose to give it a subtle light climbing effect on turn-on. Sometimes I can see it, most times not so much, but it does help to fill out the lighting and make a fairly even blade. When the blade is not in the hilt, I have blade plugs in place which I made from leftover blade tubing and some 3D printed parts which I made in the form of turbine blades (so slightly aviation related). These keep the LEDs from blinding people should it turn on.
The family seemed happy when they got them. For those wanting to see them in action, there's a Youtube video at the end demonstrating the sabers. I hope you enjoyed this side project which gave me something to do while I couldn't build the plane.