Metal Working For Plastic Plane People
I don't know how it is for most people, but I do not come from a metal working background (take a look at some of my cuts and you'll see that's true...). So I thought that there might be some others out there that also don't have much in the way of metal working skills, so I thought I would help assist with that. I learned this knowledge, so it might as well be easy for someone else to learn as well. I'll be adding as I come across new things. Keep note that I'm far from a professional. These are just the things that worked well for me.
Using a Rivet Squeezer
Tools Required:
Although there aren't many times we'll be using it, a hand rivet squeezer is very good at installing rivets properly. Some have gotten by using pliers, but I decided this was something worth learning. Luckily, Ric, who built a berkut, was willing to teach. Here's what I learned.
Directions:
Tools Required:
- Hand Rivet Squeezer
- Flush head dies (2 needed)
- Nutplate, rivets, and scrap material for practice
Although there aren't many times we'll be using it, a hand rivet squeezer is very good at installing rivets properly. Some have gotten by using pliers, but I decided this was something worth learning. Luckily, Ric, who built a berkut, was willing to teach. Here's what I learned.
Directions:
- Install the flush head dies in the rivet squeezer. These come in different thicknesses. I bought two that were different thicknesses to have some flexibility, but I think for these planes it won't matter. The main thing is to get flush heads.
- The moveable piston on the rivet squeezer is adjustable by turning it to thread in and out. This will get used to adjust for the thickness of material you are riveting to.
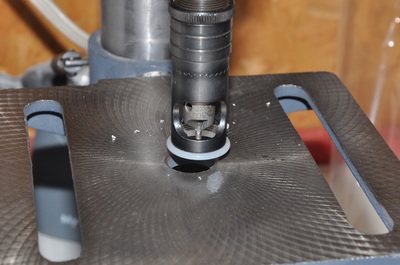
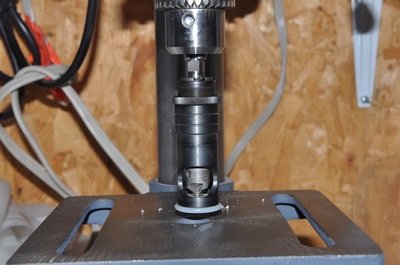
- The rivet hole will need to be countersunk so that the head is flush with the surface. A microstop makes quick work of this.
- With the rivet installed and the materials all in place, position the squeezer centered over the rivet. It doesn't matter which side is on the head of the rivet, both work fine.
- Put pressure in the direction that will press onto the rivet head, then squeeze the rivet squeezer all the way till it stops.
- Check the rivet afterwards. The head should be flush with the surface, and the end of the rivet should be 1.5 times it's original diameter and 0.5 times the diameter in height to be correctly pressed. Adjust as needed. A different length rivet may be needed.
- If a rivet needs to be removed, then use a small drill bit (smaller than the hole drilled is better), and use the small dimple mark on the rivet head to drill out the rivet.
Using a Microstop
Tools Required:
A microstop is a device that allows a certain stop point to be dialed in. The fine threading on the body allows minor adjustments to be made in height (hence the micro in the name). Once set, you can make multiple holes of the same depth, such as countersinking for rivet heads. Note that microstop countersinks have several sizes for guides. Get the ones that will be sized for the hole that you are counter sinking (example, rivets usually use a #40 hole, so a countersink bit with a #40 guide would be used).
Directions:
Tools Required:
- Microstop
- Countersink bit for microstop
- Drill or drill press
A microstop is a device that allows a certain stop point to be dialed in. The fine threading on the body allows minor adjustments to be made in height (hence the micro in the name). Once set, you can make multiple holes of the same depth, such as countersinking for rivet heads. Note that microstop countersinks have several sizes for guides. Get the ones that will be sized for the hole that you are counter sinking (example, rivets usually use a #40 hole, so a countersink bit with a #40 guide would be used).
Directions:
- The microstop has a locking nut on the body. Turn this towards the end that goes into the drill chuck.
- While holding the main body, pull on the middle part of the microstop. It should separate and a set of teeth will be visible. Turn the body one way to reduce the depth and the other way to increase the depth. Release the middle part to reengage the teeth.
- Turn the locking nut back down to secure the position.
- You can visually check the depth by pushing the body down to expose the bit and see where it stops. Get it visually close.
- Test the depth by cutting a scrap piece of material with the proper sized hole drilled and check the depth. The rivet or screw should fit flush with almost no detectable different across the surface. Adjust the microstop as needed.
Installing Nutplates
Tools Required:
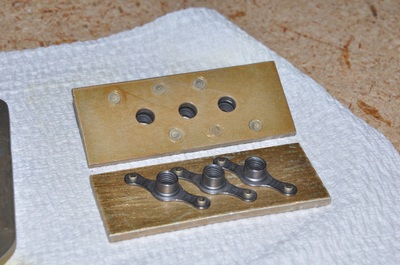
Nutplates are used to create a threaded surface for attaching things to. They get used first when you make your seatbelt inserts. The plate consists of the central main threaded portion that you will use to install a bolt into. Note that nutplates are made slightly out of round to provide some locking ability. The rivets are used to hold the nutplate in place so a bolt can be inserted.
Directions:
Tools Required:
- Drill and drill bits of correct sizes
- Flush head rivet squeezer and dies
Nutplates are used to create a threaded surface for attaching things to. They get used first when you make your seatbelt inserts. The plate consists of the central main threaded portion that you will use to install a bolt into. Note that nutplates are made slightly out of round to provide some locking ability. The rivets are used to hold the nutplate in place so a bolt can be inserted.
Directions:
- The first thing that has to be done is the holes need to be drilled for the nutplate. The first hole will be for the bolt that needs to be attached. Drill this out on the surface that will eventually have the nutplate.
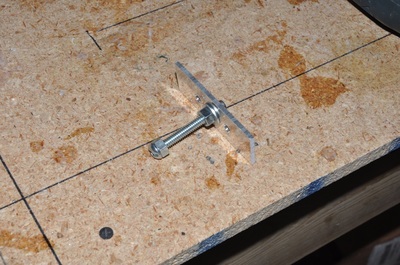
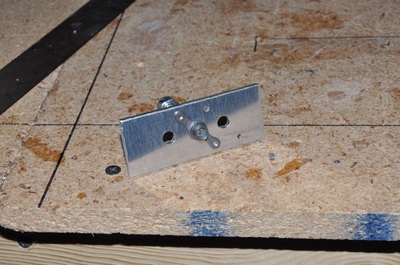
- Once the hole is drilled, Use a bolt and nut to clamp the nutplate to the surface. I usually put the bolt through one side that already has a nut added to it, then thread it onto the nutplate till it gets finger tight, then tighten the nut to clamp the nutplate in place.
- With the nutplate positioned correctly, drill the first hole out on the nutplate. Most of the nutplates that are used on the Cozy use a #40 drill bit size. Drill through using the hole in the nutplate lug to guide the bit.
- After the first hole is drilled, use a rivet to push through the nutplate and the hole to act as an anchor to keep it from turning. A cleco fastener can also be used if you have them already.
- With the nutplate anchored, drill out the other lug hole. The holes are now all matched to the nutplate.
- Debur all the holes. This can be with twist or two of a countersink bit or with a deburring tool (depending on the size of the hole and the material of the surface).
- For the two rivet holes, the side that is opposite of the nutplate will need to be countersunk to make the rivet head flush with the surface. Use a microstop that has been properly set up (see my Microstop instructions).
- Position the nuplate onto the surface and install the two rivets so that the flush head is in the countersunk holes. Squeeze the rivets to install in place.
- Verify that the rivets are the proper height and that the nutplate is installed correctly.
Cutting Aluminum Stock
Tools Required:
There are many times you will have to cut out pieces for various components on the plane. Band saws work very well at cutting aluminum stock out and is what I would recommend. The trick with band saws is that not all like to cut straight even when using the guide fence. The problem comes from flex that is present in the blade. Even after proper setup, you can still get some flex. So here's some hints on cutting aluminum.
Tools Required:
- Band Saw with a metal blade
- Ruler
- Fine tip pen
There are many times you will have to cut out pieces for various components on the plane. Band saws work very well at cutting aluminum stock out and is what I would recommend. The trick with band saws is that not all like to cut straight even when using the guide fence. The problem comes from flex that is present in the blade. Even after proper setup, you can still get some flex. So here's some hints on cutting aluminum.
- Make sure the band saw is properly set up. Blade tension should be set properly, the blade guides should be properly positioned, and the blade angle should be vertical.
- Set the blade guide just slightly higher than what you're cutting. The lower the better.
- Mark your cut line on the material with the pen and ruler.
- Mark a second line on the outside of the cut that's about a blade width away from the original line. The two lines make it easier to notice blade drift.
- Slowly feed the piece into the blade paying attention to the blade's position within the drawn lines. Adjust as needed.
- It's generally best to cut wide and buff to the line.
